Heroic Inbox Workflows: Automate Everyday Support Work

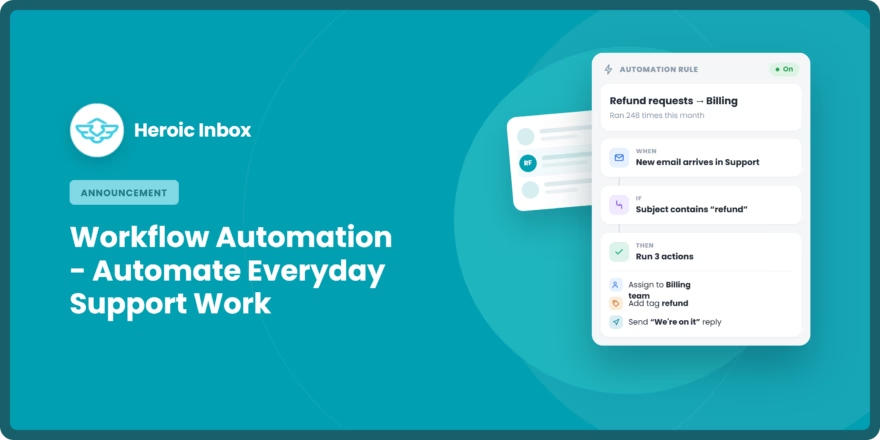
The best part about a shared inbox and helpdesk software is that they give you advanced features to automate repetitive tasks.
Whether you want to prioritize tickets from VIP customers, close tickets after a set number of days, or send feedback forms to customers, you can automate these tasks with Heroic Inbox’s Workflows feature.
The best part?
With repetitive tasks automated, you have more time to focus on what really matters: solving complex customer issues.
Switch to Heroic Inbox today with 60% OFF!
- Unlimited Users and Tickets
- Flat price, no monthly subscription
- Self-hosted
What a Workflow Actually Does
A workflow is a rule that watches your mailbox and takes action for you.
Every workflow has two parts. Conditions decide which conversations it applies to, and actions decide what happens to them. Together they work like an instruction you'd give a new hire:
- When an email arrives with ‘invoice' in the subject, tag it Billing and assign it to Sarah.
- When a conversation mentions ‘refund,' add an internal note reminding the team of the policy.
You set up the rule once, and it runs on its own from then on. Every time the conditions are met, the workflow takes the right action without anyone having to remember to do it.
Why Use Workflows (Benefits)?
Every support mailbox has a routine, and most of that routine doesn't need a person. Here's what your team gets back once the Workflows handle it:
- Stop repeating the same clicks all day: Tagging, sorting, and assigning takes seconds each time, and those seconds add up fast across a shift.
- Nothing slips through the cracks: A rule never forgets to tag a conversation at 4:50 on a Friday, and it treats the hundredth email of the day like the first.
- Get conversations to the right person immediately: Route by content, sender, or any other condition instead of letting them sit until someone has time to triage.
- Reply instantly, even at 2 a.m.: A short acknowledgment sets expectations and heads off the “any update?” follow-up.
- Give agents a head start: Create a draft with your standard refund or cancellation wording, then let an agent review and send. You get the speed without handing your voice to a robot.
- Put policy reminders where the work happens: An internal note on every refund conversation shows agents the right guidance without a handbook search, which helps new hires most.
- Surface urgent conversations outside the inbox: A Slack notification means the right person acts without watching the queue all day.
- Turn multi-step routines into one click: Your escalation process or closing checklist runs the same way every time, whoever triggers it.
- Bring stale conversations back into view: Conditions like last reply and message count catch the threads that quietly went cold.
- Keep inbox noise down: Spam conditions and automatic status changes keep junk out of the queue your team actually works.
- Make ownership clear from the start: Assigning on arrival stops two agents drafting the same reply, and stops everyone assuming someone else has it.
- Keep coverage consistent: Nights, weekends, holidays, and sick days all get the same first pass.
- Handle more volume without more triage: Growing email should mean more replies to write, not more sorting to do.
These are just a few examples. Conditions and actions combine in thousands of ways, so almost any routine your team repeats can become a workflow.
None of these is dramatic on its own. 10 seconds saved per conversation looks like nothing until you multiply it by a week of volume, and the consistency is worth more than the time anyway.
Your team also spends its attention on the part customers actually see, which is the answer, rather than the part that quietly wears them down.
And if a manager-level employee currently spends part of their day doing this sorting by hand, that is exactly the work Heroic Inbox can now do for them.
At the Core of Heroic Inbox Workflows
Workflow Templates
Heroic Inbox provides multiple workflow templates for common scenarios. For example:
- Auto-closing spam emails
- Tagging urgent tickets
- Escalate billing issues
- WooCommerce or EDD automations
This helps you get started with workflows as quickly as possible.
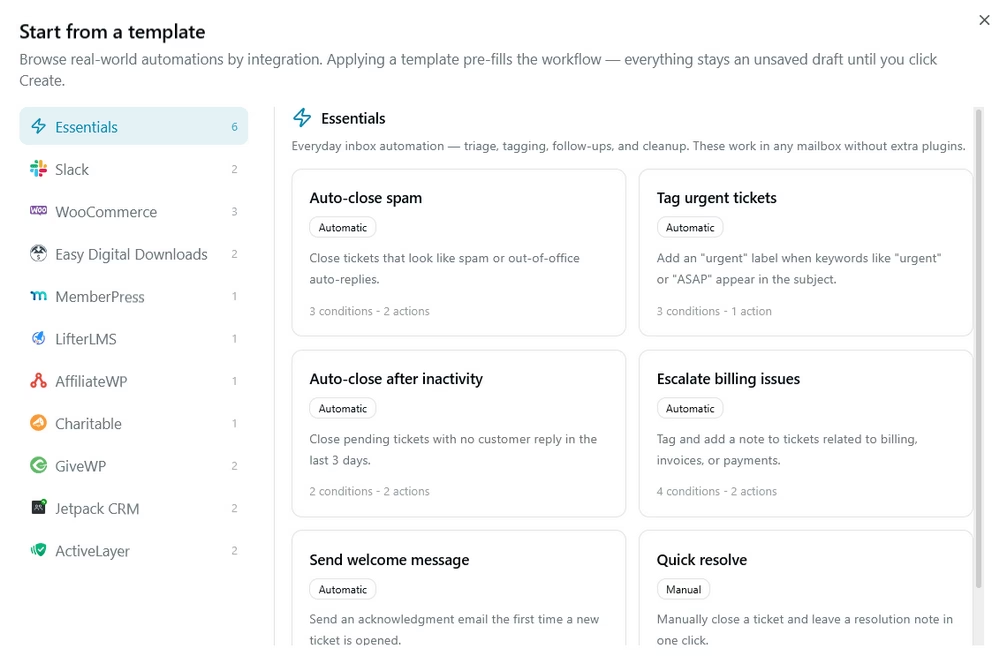
When you click the “New workflow” button, you're presented with these templates, and you can customize any of them further in the workflow editor.
The Two Types of Workflows
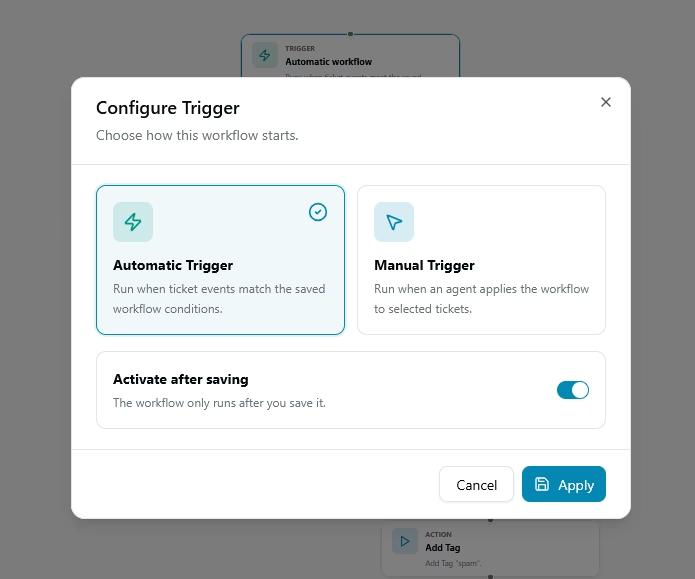
Choosing the right type is the most important decision you'll make, so it's worth understanding the difference.
- Automatic: It runs by itself whenever a conversation matches your conditions. This usually happens the moment a new email arrives or when conditions are met. Use this feature for tasks that should always be performed, such as tagging, routing to the correct agent, and sending after-hours acknowledgments.
- Manual: Does nothing until an agent chooses to run it. Use it for judgment calls: an escalation process, a closing routine, or a canned response that's only the right answer some of the time.
Tip: If you're unsure, start with Manual. You can watch what it does on a handful of conversations, and switch it to Automatic once you trust it.
Visual Workflow Builder
The standard workflow editor resembles a form. It works, but it asks you to hold the logic in your head: if the conditions match, these actions run. If they don't, nothing happens.
For a simple rule that's fine. For anything with multiple conditions, OR groups, or more than a couple of actions, the form stops being enough.
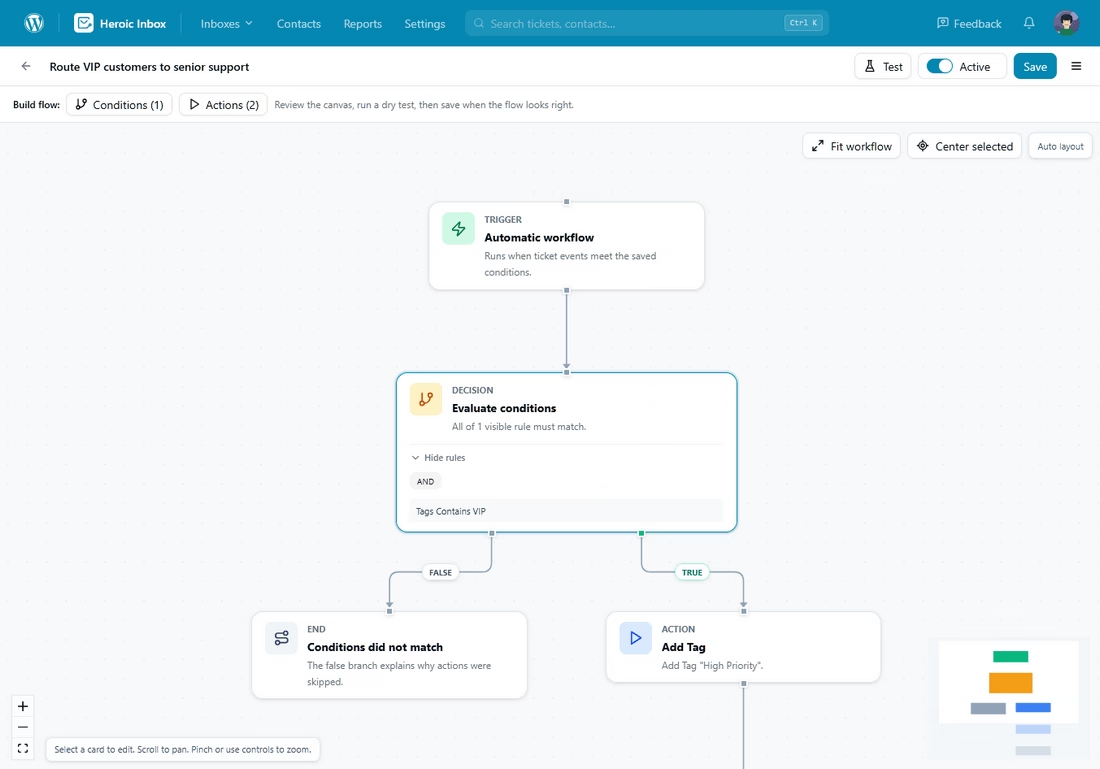
The visual builder displays the workflow as a live diagram so you can see the entire process at once instead of reasoning it through.
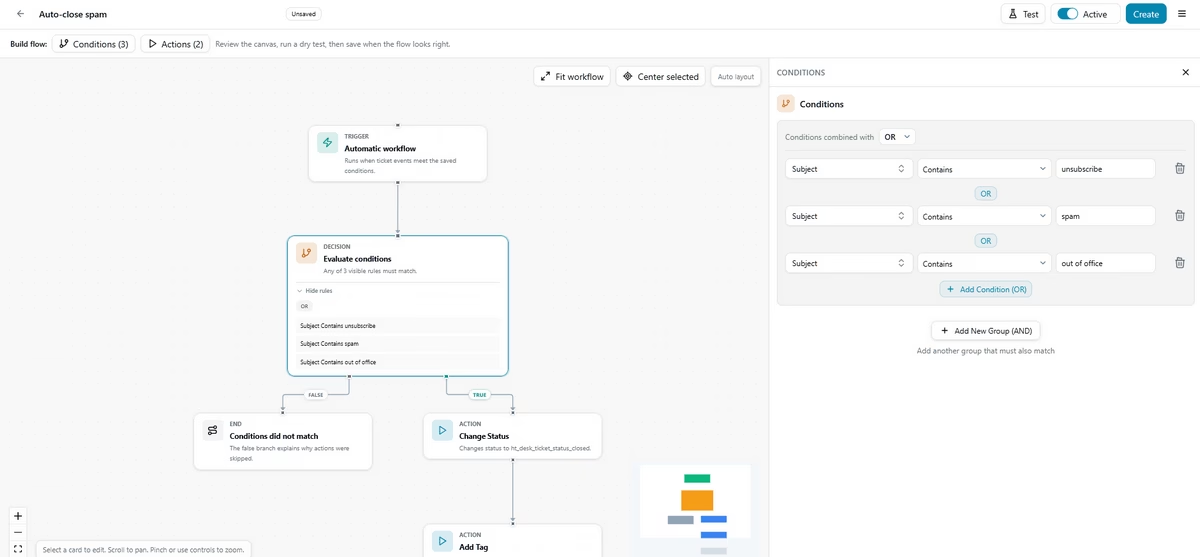
Along the top you'll find:
- The workflow name, editable in place.
- Test: opens the workflow testing panel.
- Active / Inactive: workflow on/off switch.
- Save (or Create for a new workflow).
- The menu (☰): Includes templates, copy link, duplicate, and delete workflow options.
Conditions: Deciding when a workflow runs
A good set of conditions is one of the core parts of a successful automation strategy.
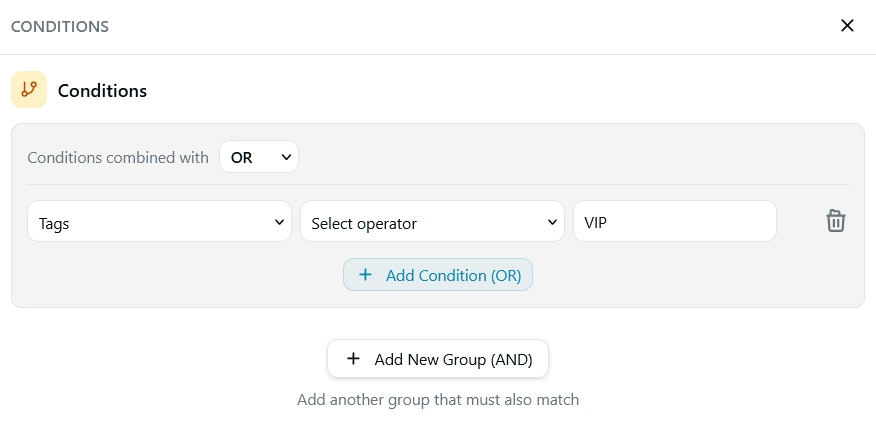
Each condition is one row: a field, an operator, and a value.
For example: Subject → Contains → invoice
Conditions live in groups:
- Inside a group, the dropdown labeled “Conditions combined with” sets whether they're joined with AND (all must be true) or OR (any one is enough).
- Between groups, it's always AND, as the separator says: All groups must match.
Which conditions are available:
| Field | Typical use |
|---|---|
| Subject | Spotting keywords in the subject line |
| Message Content | Spotting keywords in the body of the email |
| Customer | Rules for one specific contact |
| Customer Email | Matching a person or a whole domain |
| Status | Open, Pending, Closed, Spam |
| Assigned User | Who's handling it, if anyone |
| To / CC | Which address it was sent to or copied to |
| Tags | Reacting to tags, including when one is Added or Deleted |
| Has Attachments | Conversations with files attached |
| Messages Count | How long the thread is |
| Last Message Count | How many replies in a row came from the same side |
| Date Created | A rolling window, e.g. is in the last 2 days |
| Exact Date Created | A fixed date or a date range |
| Last Reply | How long since the last reply |
The available operators depend on the field:
- Text fields can use Contains, Is equal to, Starts with, Ends with, or Is empty.
- Number fields use options such as Equal to, Greater than, and Less than, while date fields let you set a date or range.
- Some fields, such as Status, Assigned User, Customer, and Has Attachments, don't need an operator; you just choose a value.
Conditions from your other plugins
If you use WooCommerce, Easy Digital Downloads, MemberPress, LifterLMS, AffiliateWP, Charitable, GiveWP, or ActiveLayer, their data also appears in the field list. This lets you create rules based on details such as:
- Order totals
- Membership status
- Course enrollment
- Donation amounts
- Spam scores
- And more
That lets you write rules like “if the customer has spent over $500, tag it VIP”.
Plugins you haven't installed still appear in the list, but they're grayed out so you can see which fields they would add. These options only become active when the plugin is installed and activated.
Actions: Deciding What Happens
Actions are what the workflow does when the conditions match. You can add several, and they run in order.
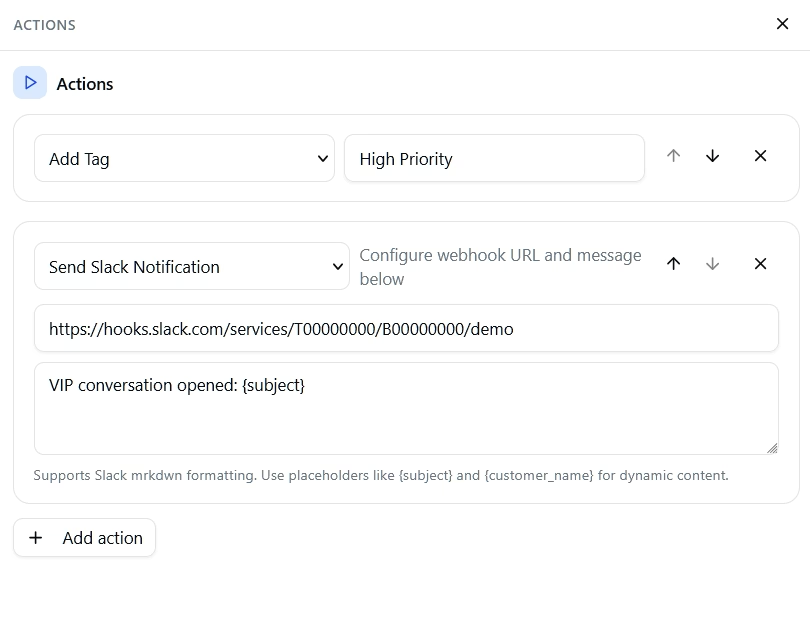
Which actions you can perform:
| Action | What it does |
|---|---|
| Send an Email | Sends a reply to the customer |
| Create a draft | Writes a reply and leaves it unsent for an agent to review |
| Forward | Forwards the conversation to another address |
| Add Internal Note | Adds a note only your team can see |
| Change Status | Sets Open, Pending, Closed, or Spam |
| Assign to User | Hands the conversation to a specific agent |
| Add Tag | Adds a tag |
| Remove Tag | Removes a tag |
| Send Slack Notification | Posts a message to Slack |
| Delete | Deletes the conversation |
Be careful with two of these Actions:
Delete permanently removes conversations, while Send an Email sends a message to the customer without anyone reviewing it first.
When you're unsure, use Create a draft instead; an agent can review it and click Send. You get the time savings without giving up that final human check.
How to Build Your First Workflow
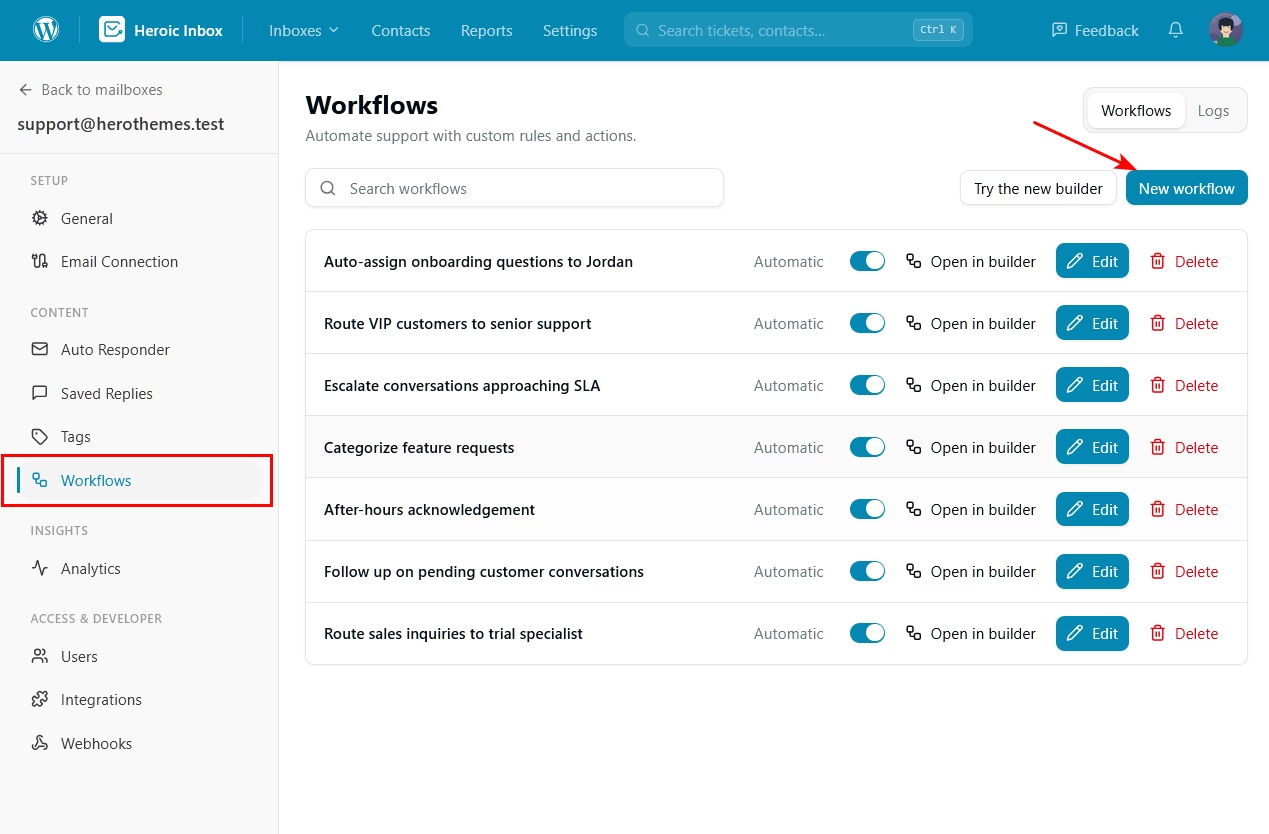
Now that you have a good understanding of how workflows work, it's time to create your first one:
- Open the mailbox-specific settings and access the Workflows section.
- Click on the New Workflow button
- Select a premade template, or close the template library to start from scratch
- Select the type of workflow (automatic or manual)
- Set the conditions: the rules deciding which conversations this applies to.
- Set the desired actions: what should happen.
- Test it using the option provided in the workflow editor or a proper controlled environment.
- Save it and activate it to make the workflow live.
Frequently asked questions
Will a workflow run on conversations I already have?
Automatic workflows act on events as they occur, such as a new email arriving or a status changing.
To apply something to existing conversations, use a manual workflow and run it on a selection.
My workflow isn't running. What should I check?
- Is the switch on?
- Is it set to Automatic? A Manual workflow only runs when someone applies it.
- Are the conditions too narrow? Remember separate groups must all match.
- Is Is equal to being used where Contains was meant?
- Check the Logs tab to see whether it fired at all.
The fastest way to get an answer is to open it in the Visual Builder and click “Run Test.”
Can a workflow run on more than one mailbox?
No. Workflows belong to a single mailbox. Recreate the rule in each mailbox that needs it.
What happens when two workflows match the same conversation?
They both run. But be careful when they conflict. Assigning one to Sarah and another to Tom is like a coin toss that you'll eventually lose.
Is there an undo?
No, which is exactly why the “Run Test” feature is there and why creating a draft is safer than sending an email while you're setting things up.
Ready to Hand the Busywork to Heroic Inbox?
The Heroic Inbox Workflows feature is no longer in beta and is now fully functional and supported. To access Workflows:
- Make sure that you are on the Heroic Inbox Plus plan or higher.
- Download the latest version of Heroic Inbox plugin from Your Account.
- Install or update it as you would with any other WordPress plugin.
- Test the workflow feature, optimize it as needed, and scale it up.
If there is a workflow or automation that cannot be done with the current version of Heroic Inbox, please share your feedback using the in-app option or commenting below.
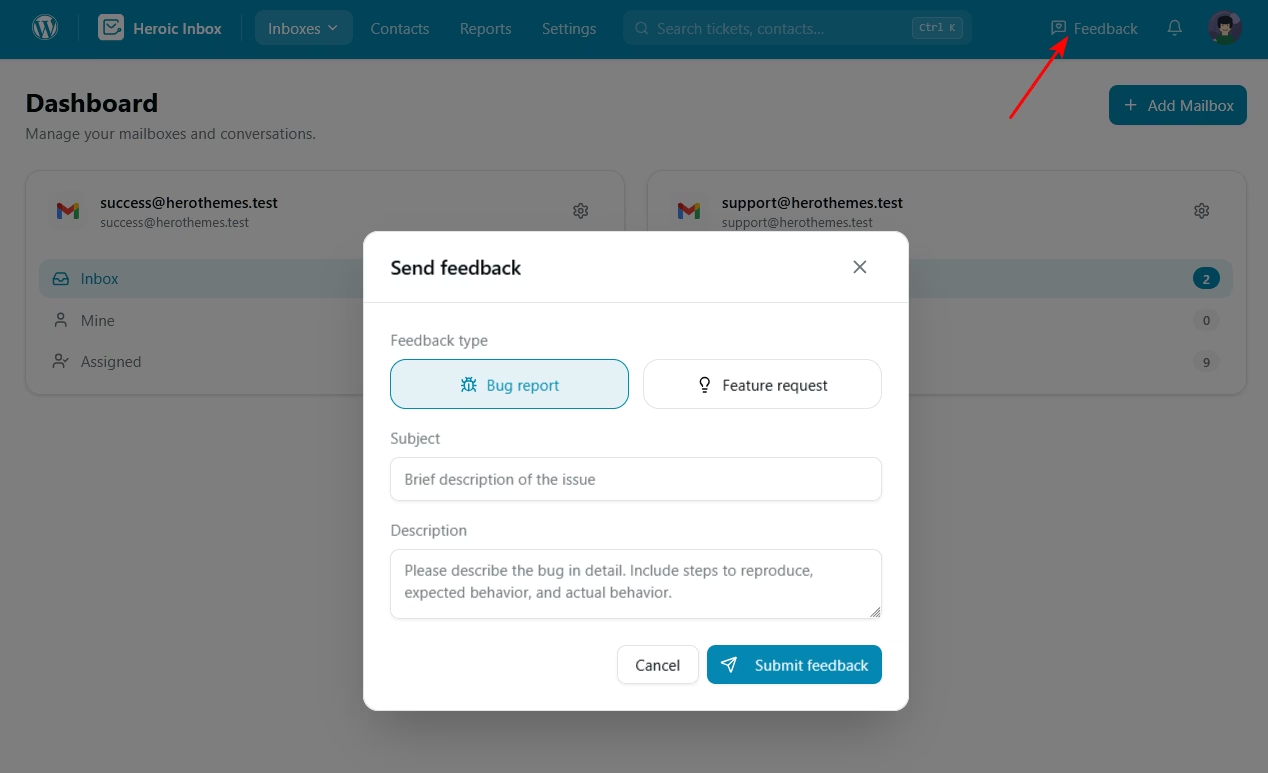
We are happy to make that workflow possible.
We are also offering a special introductory price of 60% off, plus a 14-day unconditional money-back guarantee. Try Heroic Inbox today! You'll love it!






Leave A Comment?
You must be logged in to post a comment.