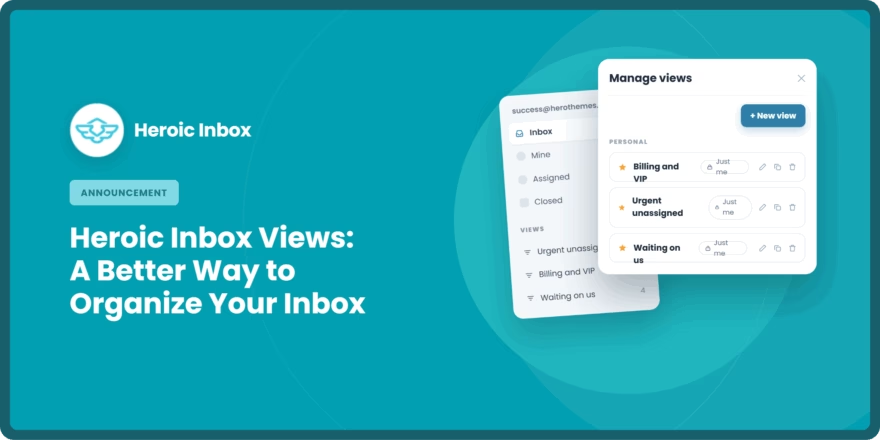
Heroic Inbox Views: A Better Way to Organize Your Inbox

The hardest part of a busy support inbox isn’t always answering tickets. Sometimes, it’s finding the right tickets to answer next.
A large mailbox can contain everything from routine questions to urgent requests, VIP customers, aging conversations, and tickets waiting for another team member.
With the Heroic Inbox Views feature, you can create a separate folder for the conversations that matter most, then keep it in your sidebar for one-click access.
Let’s take a closer look at Heroic Inbox Views!
Switch to Heroic Inbox today with 60% OFF!
- Unlimited Users and Tickets
- Flat price, no monthly subscription
- Self-hosted
What a View Actually Does
With views, you can create separate mailbox folders (similar to mine, spam and draft) based on your specified conditions.
Think of them as a better way to prioritize your or your team’s tickets.
Every view is built from conditions (the rules that decide which conversations show up) and a name (so you recognize it at a glance).
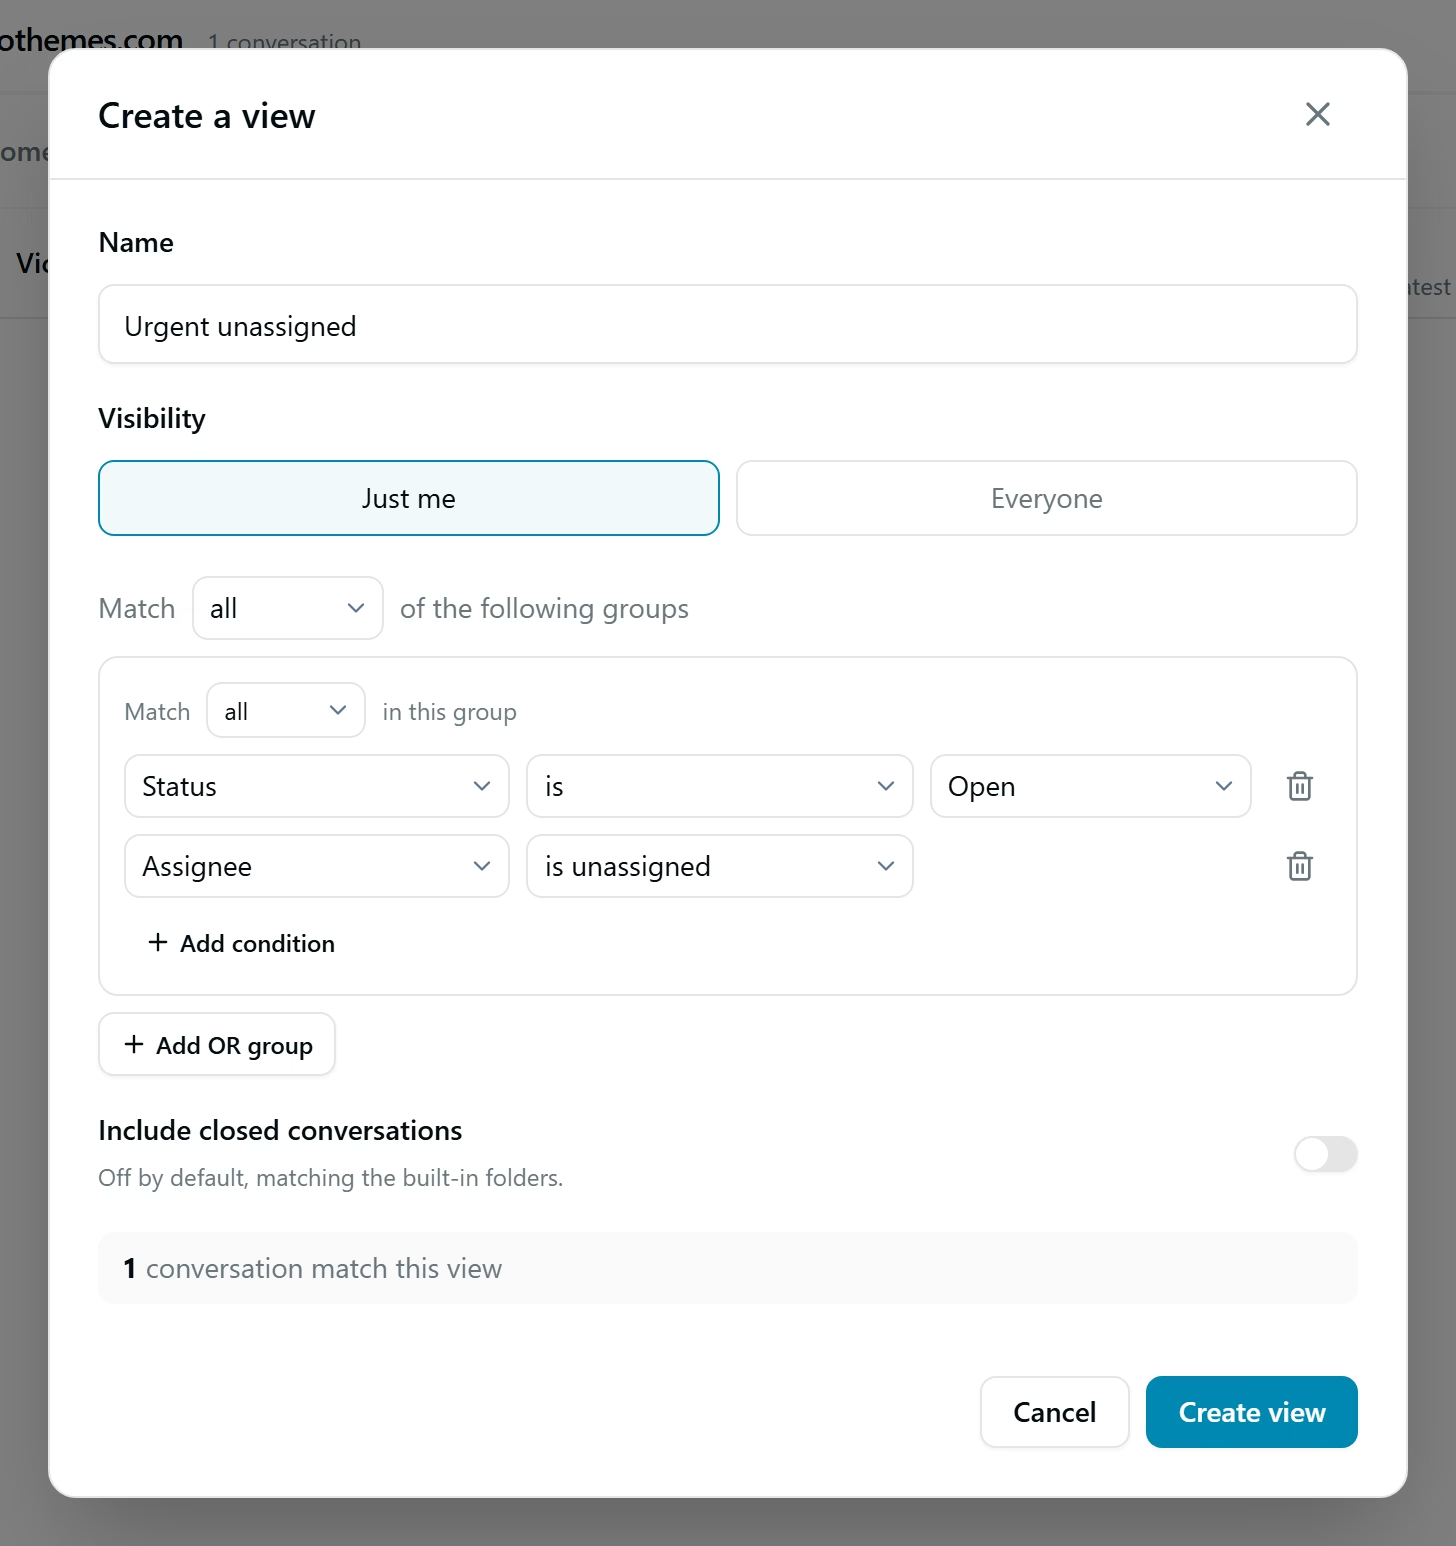
You can also choose who else sees it and whether closed conversations are included.
Once you save it, Heroic Inbox keeps the list current on its own, updating the count as conversations arrive, get assigned, get tagged, or close.
A view never moves, edits, or deletes anything.
Why Use Views?
Most support routines follow a pattern. A good view matches that pattern so that you don’t have to rebuild the same filter every morning.
Here’s what saved views give a team:
- Start the day with the right queue: Instead of bouncing between filters, searches, and folders, agents can jump straight into the work that matters.
- Catch forgotten conversations: A view such as “Unassigned, older than 2 days” gives you a quick way to spot tickets that may be slipping through the cracks.
- Respond to urgent tickets faster: Keep high-priority conversations in a dedicated view so agents can find them without searching the full inbox.
- Keep team priorities consistent: A shared “Refund requests” view gives everyone the same set of rules for finding and handling those conversations.
- Make shift handoffs easier: The next agent can open the same shared views and see what needs attention without waiting for a verbal update.
- Give managers better visibility into workloads: Views for unassigned, pending, or aging conversations make common queue checks much easier.
- Create focused queues for specialized work: Build separate views for billing, refunds, technical issues, VIP customers, or other support categories.
- Simplify recurring checks: Transform morning triage, backlog reviews, and pending-ticket checks into repeatable, one-click routines.
- Keep personal workflows flexible: Agents can pin the views they use most without changing what appears in anyone else’s sidebar.
The real benefit isn’t just a few saved clicks. It’s eliminating the repetitive manual work that agents perform every time they start a queue, check for overdue work, or switch to a different support task.
Exploring Views Functionality
We designed Views to be simple yet robust. Now, let’s explore some of its key features.
1. Conditions
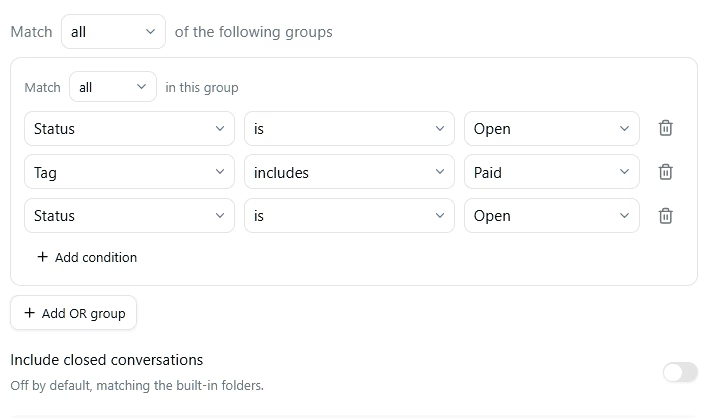
Conditions are the rules, and they’re easier than they look.
Each condition is a single row made of three parts: a Field (what to look at), an Operator (how to compare it), and a Value (what to compare against).
For example: Status → is → Open.
To add another row, click Add condition. The operators change to suit the field you pick, so you’re only ever offered comparisons that make sense for that field.
Match All vs. Match Any
At the top of the conditions area you’ll see: “Match [all / any] of the following.” This one control decides how your conditions combine.
- all: every condition must be true. Use this to narrow a list down.
- any: at least one condition must be true. Use this to gather different things into one list.
If all your conditions sit in a single group, this setting simply decides whether they’re joined by “and” or “or.”
Groups: Mix “And” With “Or”
Sometimes one rule isn’t enough. Say you want open conversations that are tagged either Refund or Billing. That’s an “and” (must be open) combined with an “or” (either tag). Groups let you build exactly that:
- Set the top control to Match all of the following groups.
- In the first group, add Status is Open.
- Click Add OR group.
- In the new group, add Tag includes Refund and Tag includes Billing, then set that group’s own control to Match any in this group.
Each group has its own all/any control, which appears as soon as the group holds more than one condition.
What You Can Filter On (Conditions)
Heroic Inbox gives you a focused set of fields to filter on, and each one offers only the operators that fit it.
Here’s what you have to work with:
| Field | What it filters on | Common options |
|---|---|---|
| Status | Where the conversation sits | Open, Pending, Closed, Spam |
| Assignee | The agent handling it | A specific person, “Me (the current user),” is unassigned, is assigned |
| Tag | Tags on the conversation | includes / does not include |
| Customer | The contact who wrote in | Search by name or email |
| Subject | Text in the subject line | contains, does not contain, starts with |
| Date created | When the conversation first arrived | Exact date (is before / is after) or a rolling window (is in the last 3 days) |
| Last updated | When anything last happened on it | Same options as Date created |
2. Who Can Do What
Permissions follow a simple logic: you control your own personal views and your own sidebar, while shared views belong to the people who manage the mailbox.
| Action | Who can do it |
|---|---|
| Create, edit, delete a personal view | Anyone, for their own views |
| Create, edit, delete a shared view | Mailbox managers and admins |
| Pin or unpin any view they can see | Everyone, their own sidebar only |
| Duplicate any view they can see | Everyone, and the copy is personal |
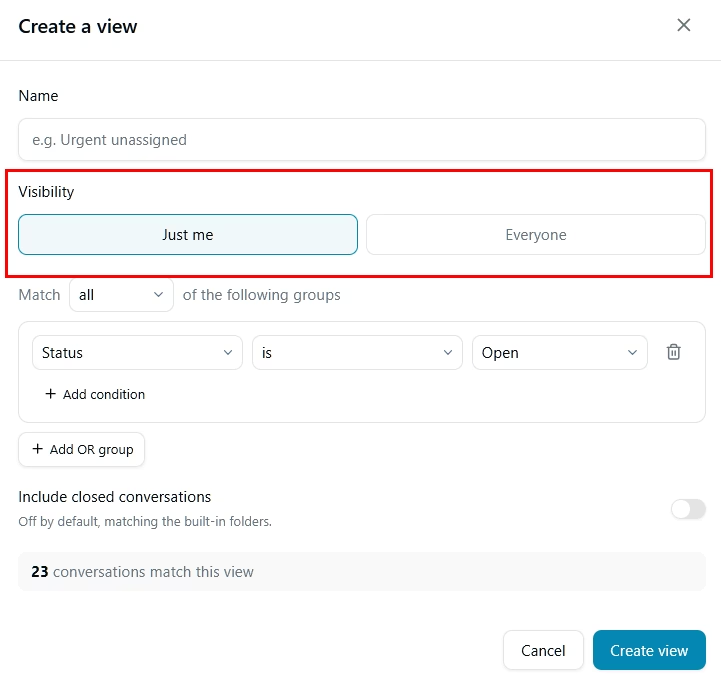
If “Everyone” is greyed out when you create a view, you don’t have manager access to that mailbox.
Create it as a personal view instead, or ask an admin to make a shared one.
3. How to Manage, Duplicate, and Delete Views
Click the gear icon in the Views section header to open Manage views. Every view you can access is listed here, split into Personal and Shared.
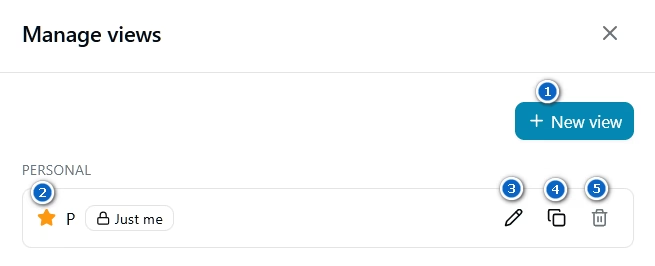
- New View: Create new View.
- Star: pin or unpin it from your own sidebar.
- Edit: change the name, visibility, or conditions.
- Duplicate: make a copy to experiment with.
- Delete: remove it permanently.
You can also reach Edit, Duplicate, Remove from sidebar and Delete from the “⋯” menu that appears when you hover over a View in the sidebar.
How to Create Your First View
You’ll find everything you need in the mailbox sidebar, and creating a view takes under a minute:
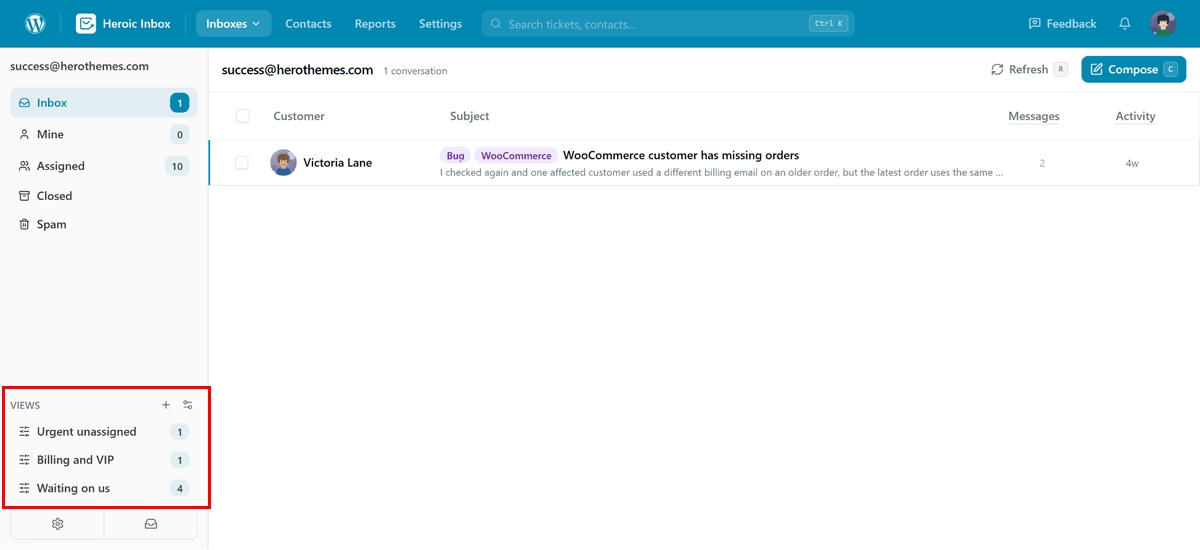
- Open a mailbox and find the Views section in the left sidebar.
- Click the + button in the Views header. If you don’t have any views yet, click + Create a view instead.
- Type a Name you’ll recognize instantly, like Urgent unassigned.
- Choose the Visibility: “Just me” for a personal view nobody else sees, or “Everyone” for a shared view the whole team gets.
- Set up your conditions, which are the rules that decide which conversations appear.
- Leave Include closed conversations off unless you specifically want closed ones in the list.
- Watch the preview line at the bottom. It counts matching conversations as you build, so you know right away whether your rules are right.
- Click Create view.
- On the Manage Views screen, select the star/bookmark button in front of your created view to pin it in your left sidebar.
That’s how simple it is to create views.
3 Real-World View Examples You Can Copy Today
Theory is fine, but working views are better. Here are three that you can recreate and then adjust for your team.
1. Refunds and billing (one list, two topics)
Match all of the following conditions:
- Group 1: Status is Open.
- Group 2 (match any): Tag includes Refund, Tag includes Billing.
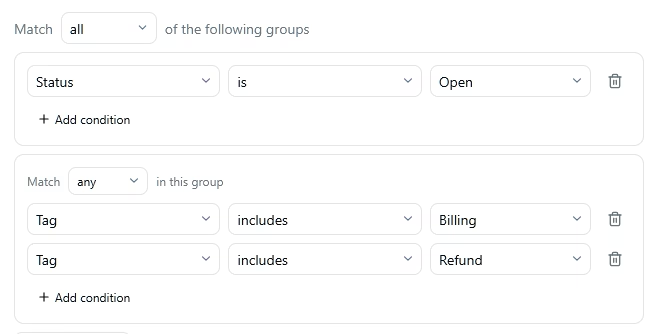
With this view, the agents responsible for refunds and billing tickets can more easily find and prioritize them.
2. Waiting for 20 hours (pending conversations that have gone quiet)
There is nothing more frustrating for customers than waiting days for a reply when you promised a response within 24 hours of submitting your support form.
Here is a View that helps you prioritize tickets that have been waiting a long time. Set the following conditions:
- Status is Open
- Last updated is not in the last 20 hours.
These catches pending or quietly forgotten threads.
3. VIP customer (everything from one important account)
Don’t want to disappoint your VIPs? Create a separate view for them and prioritize their tickets:
- Status is Open
- Tag includes VIP
Note: Most of the views you create will be around tags. This includes creating and managing tags like VIP, Billing, and Tier 1, so you and your team will need to have a solid tagging habit.
A huge part of tagging can be automated with Heroic Inbox’s Workflows feature, Check out this guide on workflows to learn more.
Frequently Asked Questions
Will a shared view disappear for everyone if I unpin it?
No. Pinning is personal, so unpinning only changes your own sidebar.
Can one view cover several mailboxes?
No. Each view belongs to a single mailbox, so create a similar view in each mailbox that needs it.
What happens when a tag, agent, or customer referenced in a view is deleted?
The view keeps working, and the editor marks the missing item as “(deleted)” so you can swap it for something else.
Final Thoughts: Make Your Sidebar Work for You
Heroic Inbox Views feature will transform your daily routine by turning your regular searches into one-click folders.
Start with two or three views, share them with your team, and let your usage determine what else you need.
If you haven’t tried Heroic Inbox yet, now is the time! Take advantage of our special introductory pricing and save 60%. Plus, you always have the option of a 14-day money-back guarantee if you don’t like it.
But we know you’ll love the new Heroic Inbox!






Leave A Comment?
You must be logged in to post a comment.