The Heroic Inbox plugin requires an Azure app to access Microsoft 365 or Outlook.com inboxes and send and receive mail on behalf of the plugin.
Once the App creation is complete, a Tenant ID, Client ID, and Client Secret will be generated, which can be entered in the Heroic Inbox setup assistant during setting up the mailboxes.
Step 1: Log In to Azure Portal
- Go to the Azure Portal.
- Click on View under Manage Microsoft Entra ID.
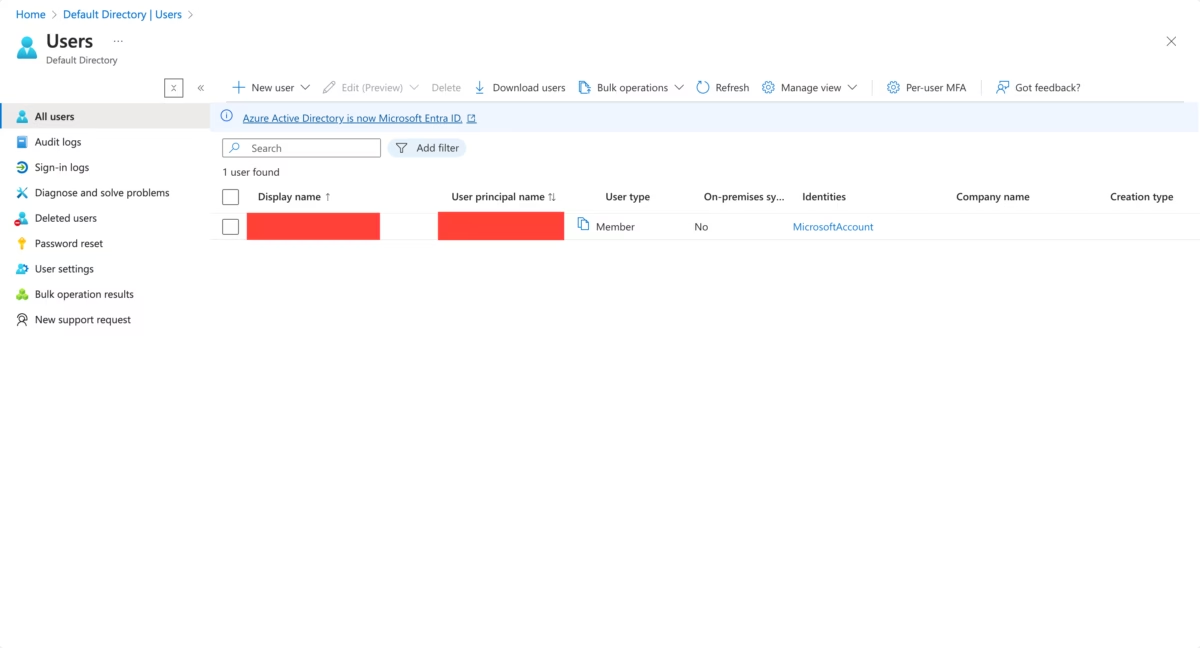
Step 2: Add Users
- Navigate to Users.
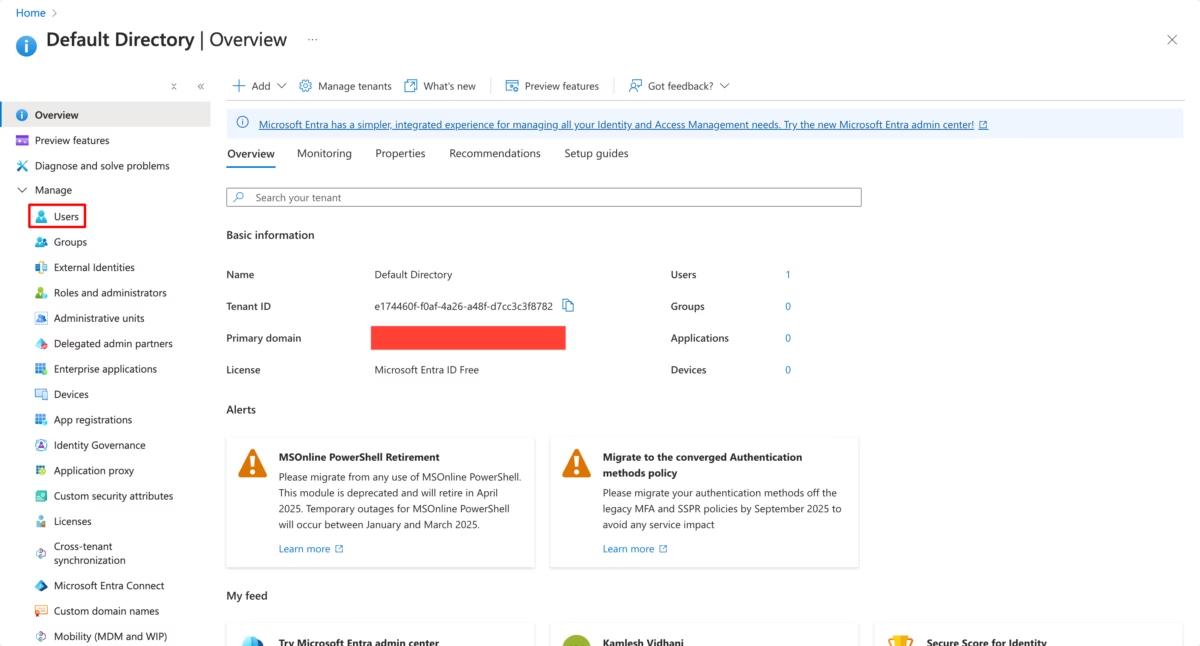
- Add the users who will have access to the Microsoft OAuth app.
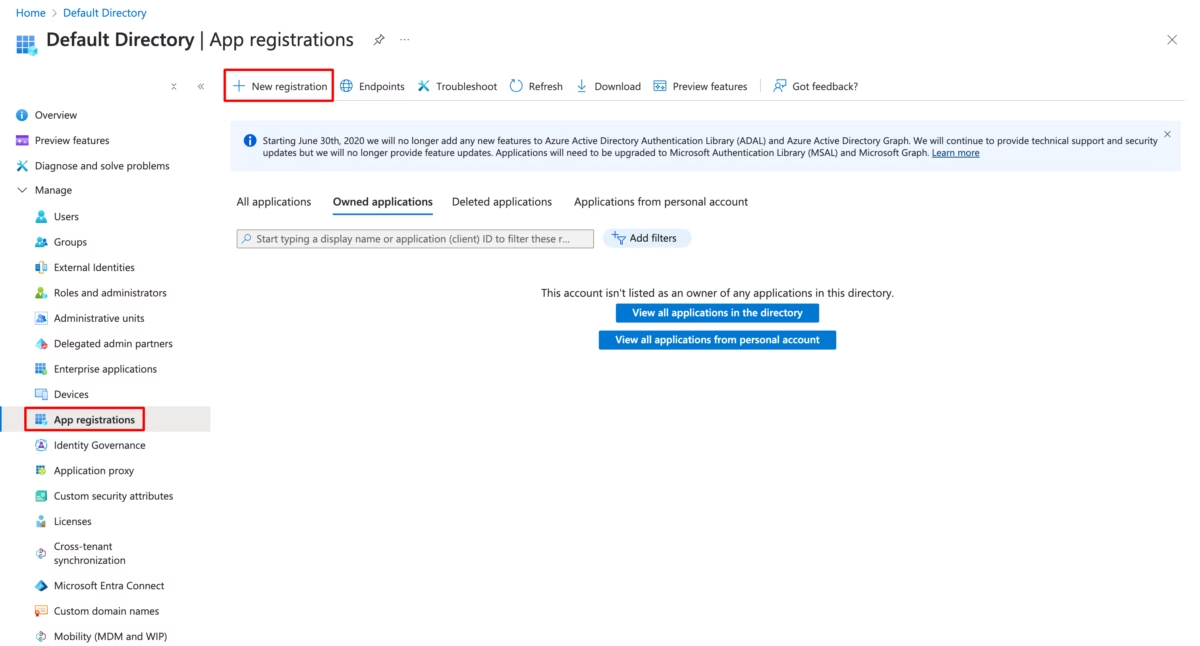
Step 3: Register a New App
- Go to App Registrations.
- Click on New Registration.
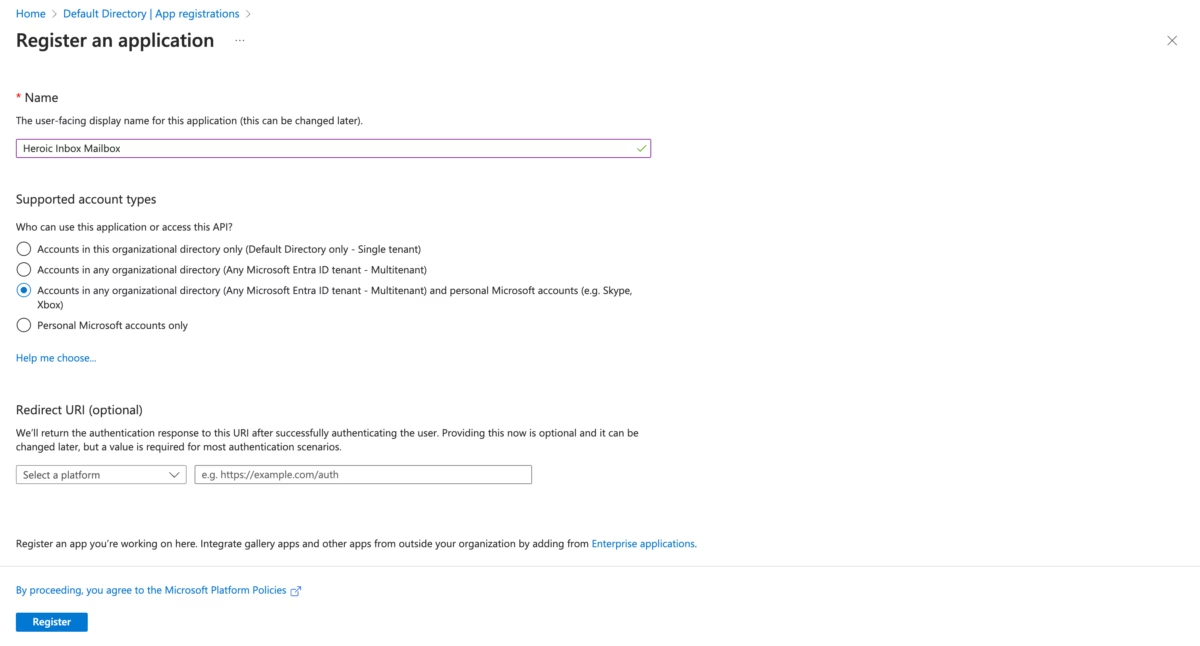
- Enter your desired App Name.
- Ensure that Multitenant is selected.
Step 4: Configure Authentication
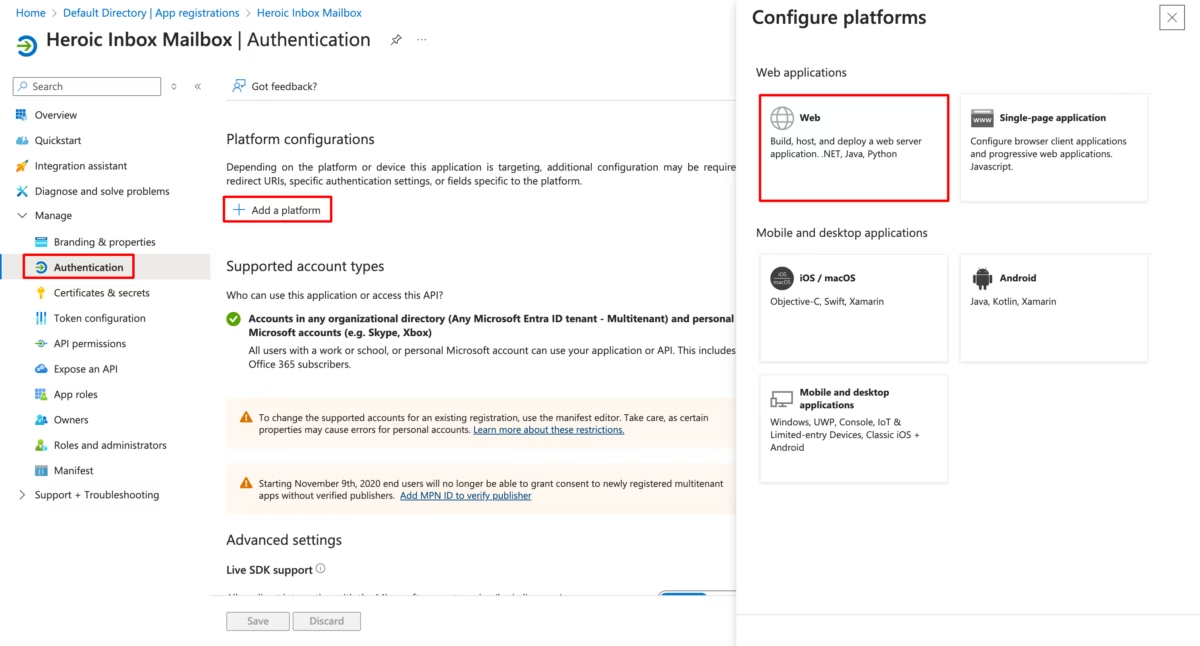
- Go to Authentication → Add a Platform → Web.
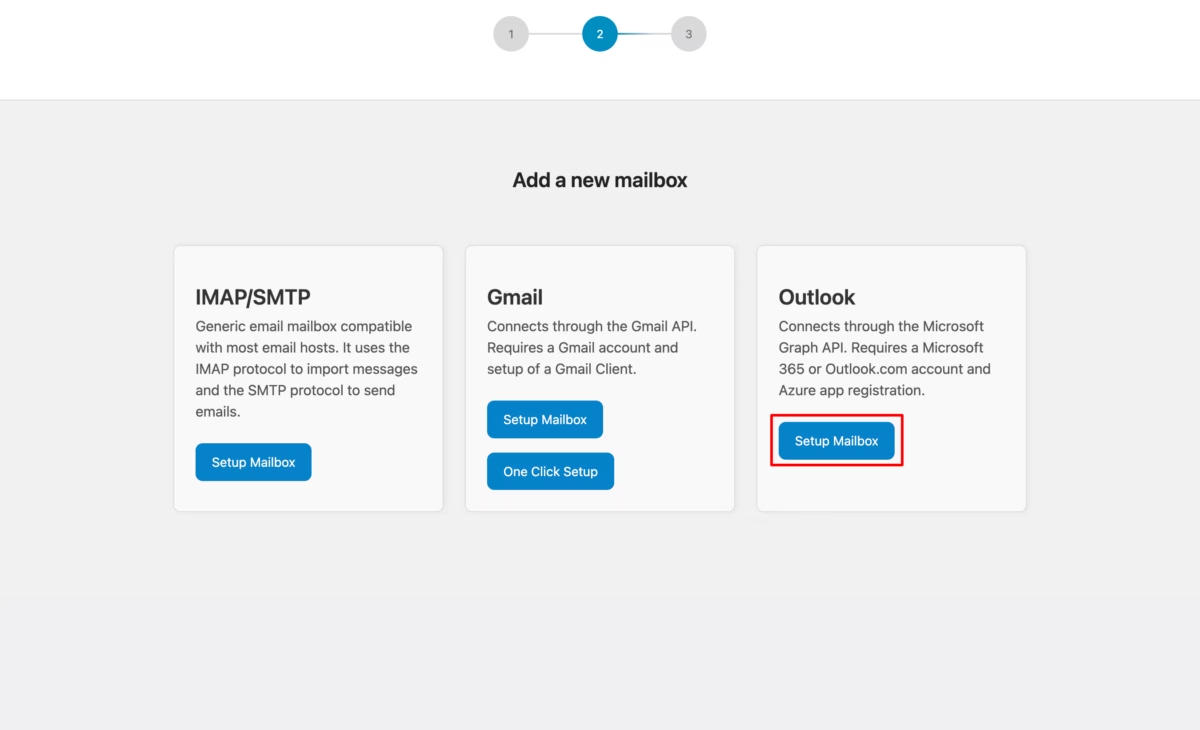
- In Heroic Inbox, add a new mailbox and select Outlook.
- Copy the Redirect URI from Heroic Inbox.
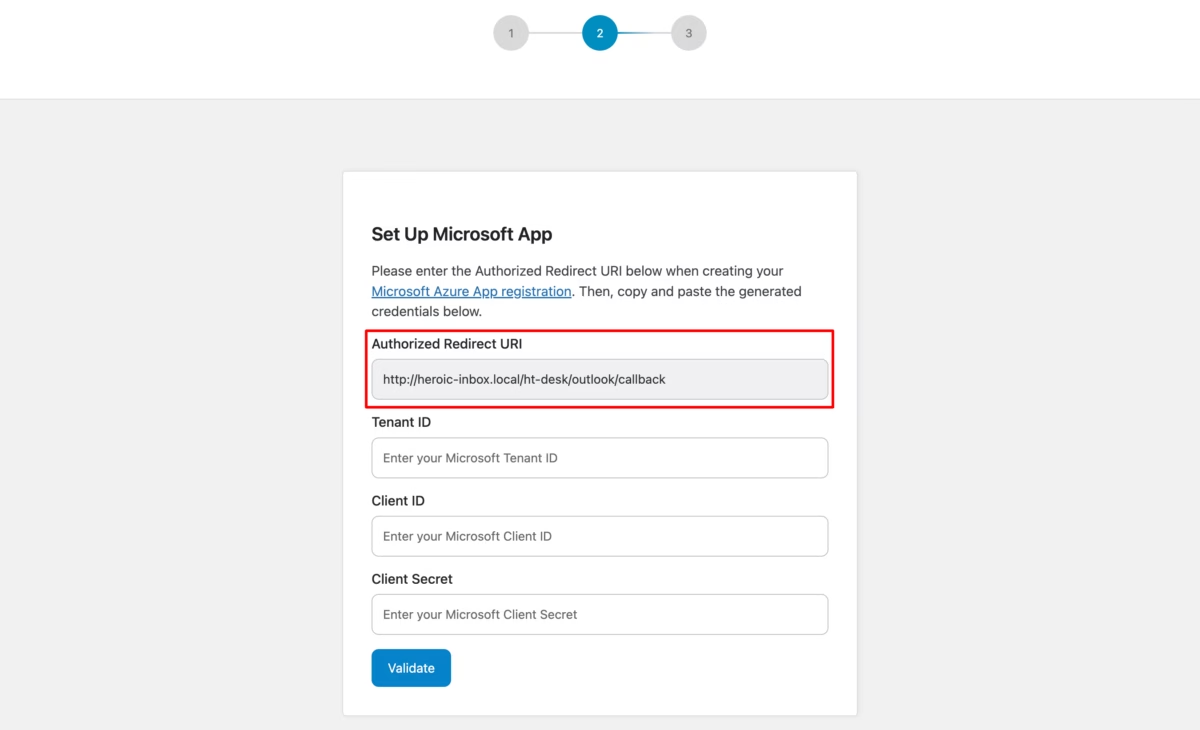
- Paste the Redirect URI into Azure and click Configure.

Step 5: Set API Permissions
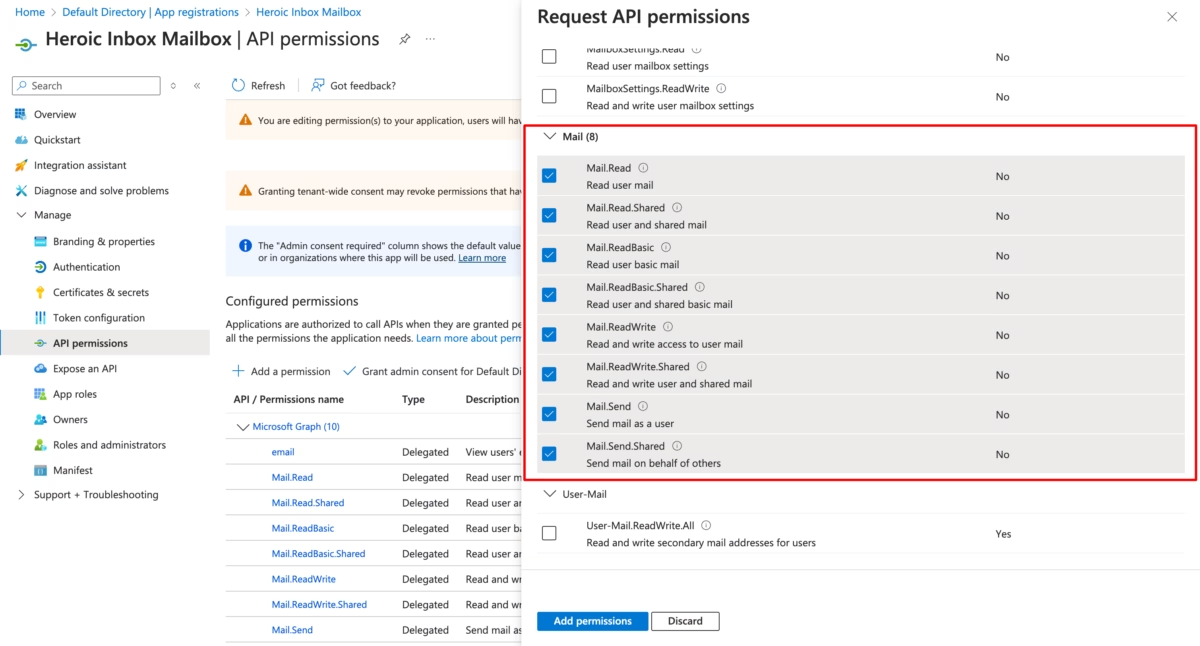
- Navigate to API Permissions.
- Click on Add a Permission.
- Select Microsoft Graph.
- Ensure all required permissions are added.
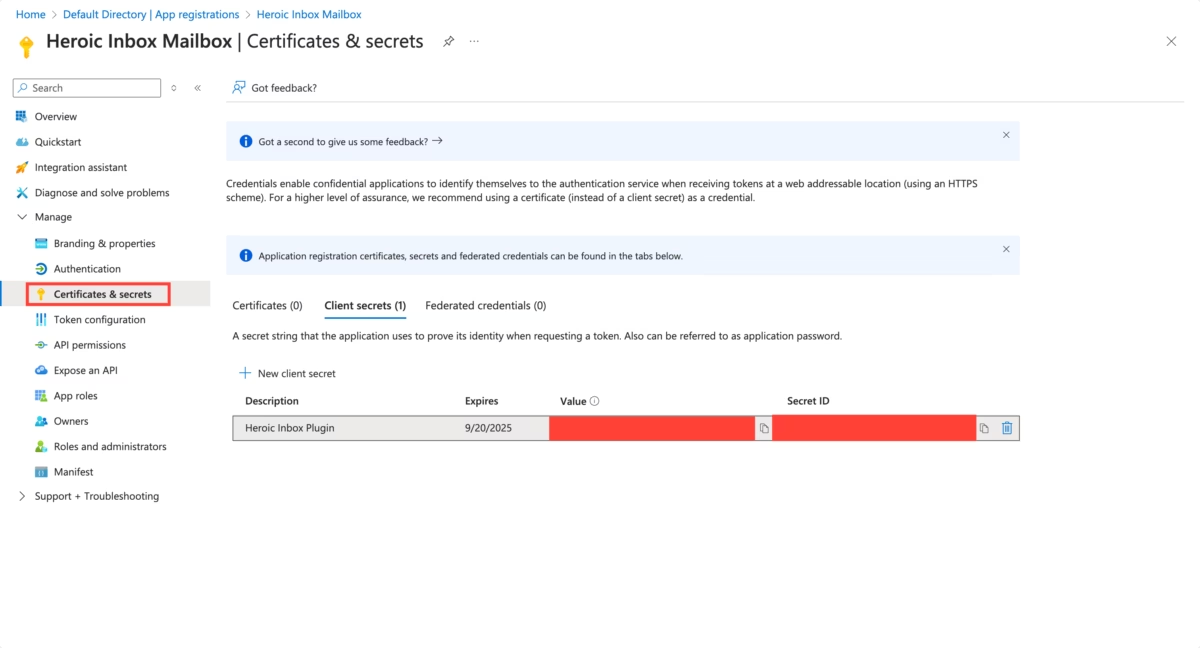
Step 6: Generate Client Secret
- Go to Certificates & Secrets → New Client Secret.
- Select an expiry period for the secret.
- Click Add.
- Copy the Secret Key and save it securely before refreshing the page.
Step 7: Retrieve Application and Tenant IDs
- Return to the Overview section.
- Copy the Application ID and Tenant ID.
Step 8: Final Configuration in Heroic Inbox
- Paste the credentials (Application ID, Tenant ID, and Secret Key) into Heroic Inbox.
- Click Validate → Select Mailbox.
- Follow the on-screen prompts to complete the setup.