Mailbox Configuration
General Mailbox Settings
Once your mailbox is connected, you can customize its settings to match your workflow. This guide covers all configuration options available for your inbox.
Accessing Mailbox Settings
To configure a mailbox:
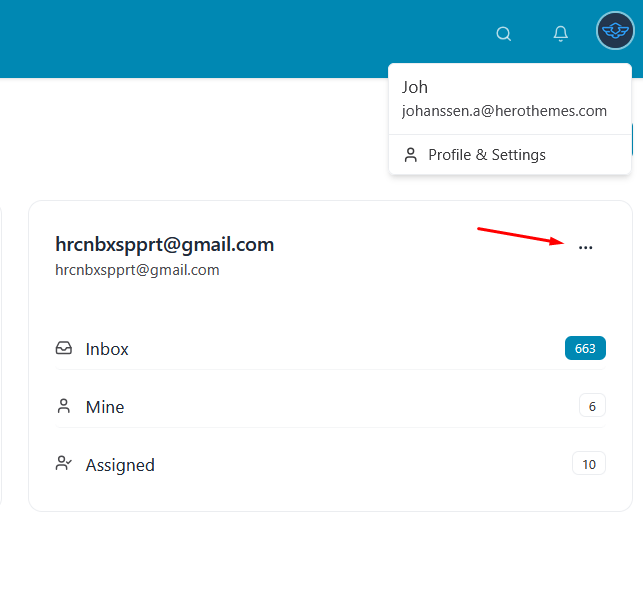
- Go to Heroic Inbox in your WordPress dashboard
- From the dashboard, click the ⋮ (three dots) menu on any mailbox card
General Mailbox Settings
The General tab contains basic mailbox information and mail fetching options.
Mailbox Name and Description
Mailbox Name
- Display name for your mailbox
- Visible to all team members
- Example: “Sunshine Apparel Support” or “Sales Inquiries”
Description (Optional)
- Add internal notes about this mailbox
- Example: “Primary customer support for online t-shirt orders”
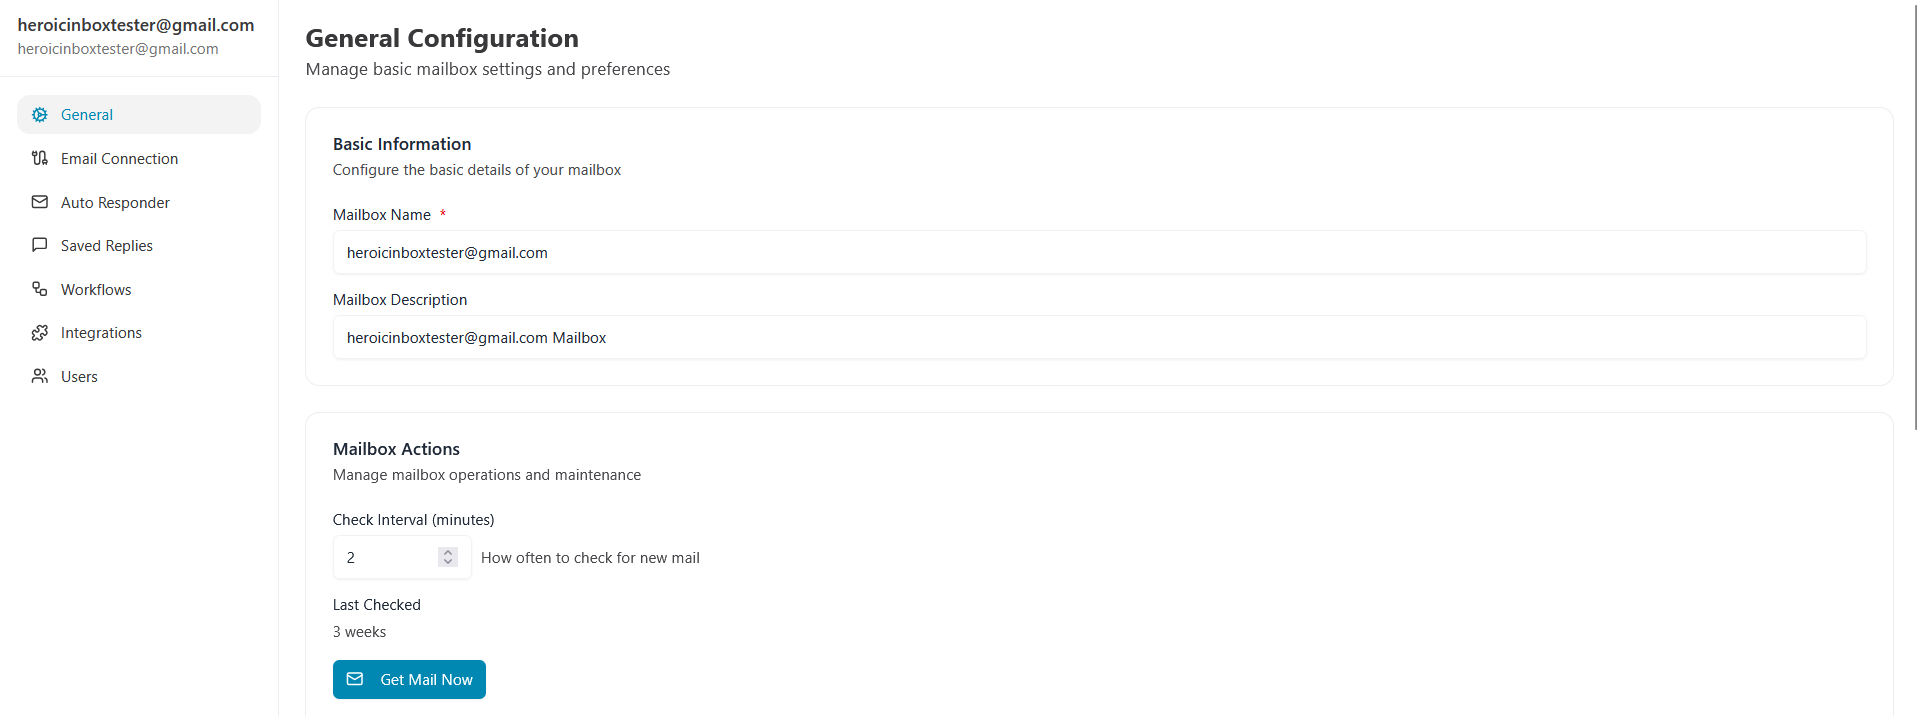
Check Interval & Get Mail Now
Controls how often Heroic Inbox checks for new emails automatically.
- Default: Every 12 minutes (720 seconds)
- Recommended: 5-15 minutes for active support teams
- Lower values = More frequent checks, more server resources
- Higher values = Less frequent checks, lower server load
To change:
- Locate the Check Interval field
- Enter the number of seconds between checks
- Click Save Changes
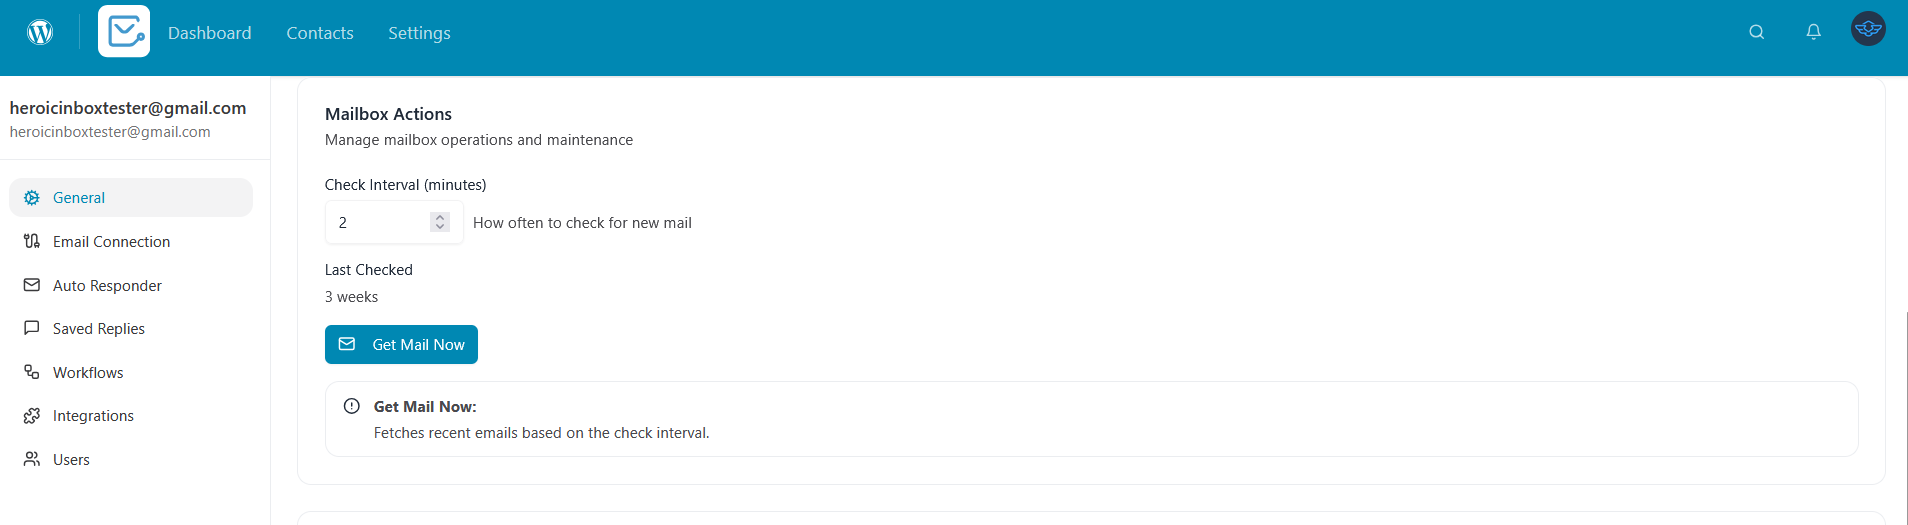
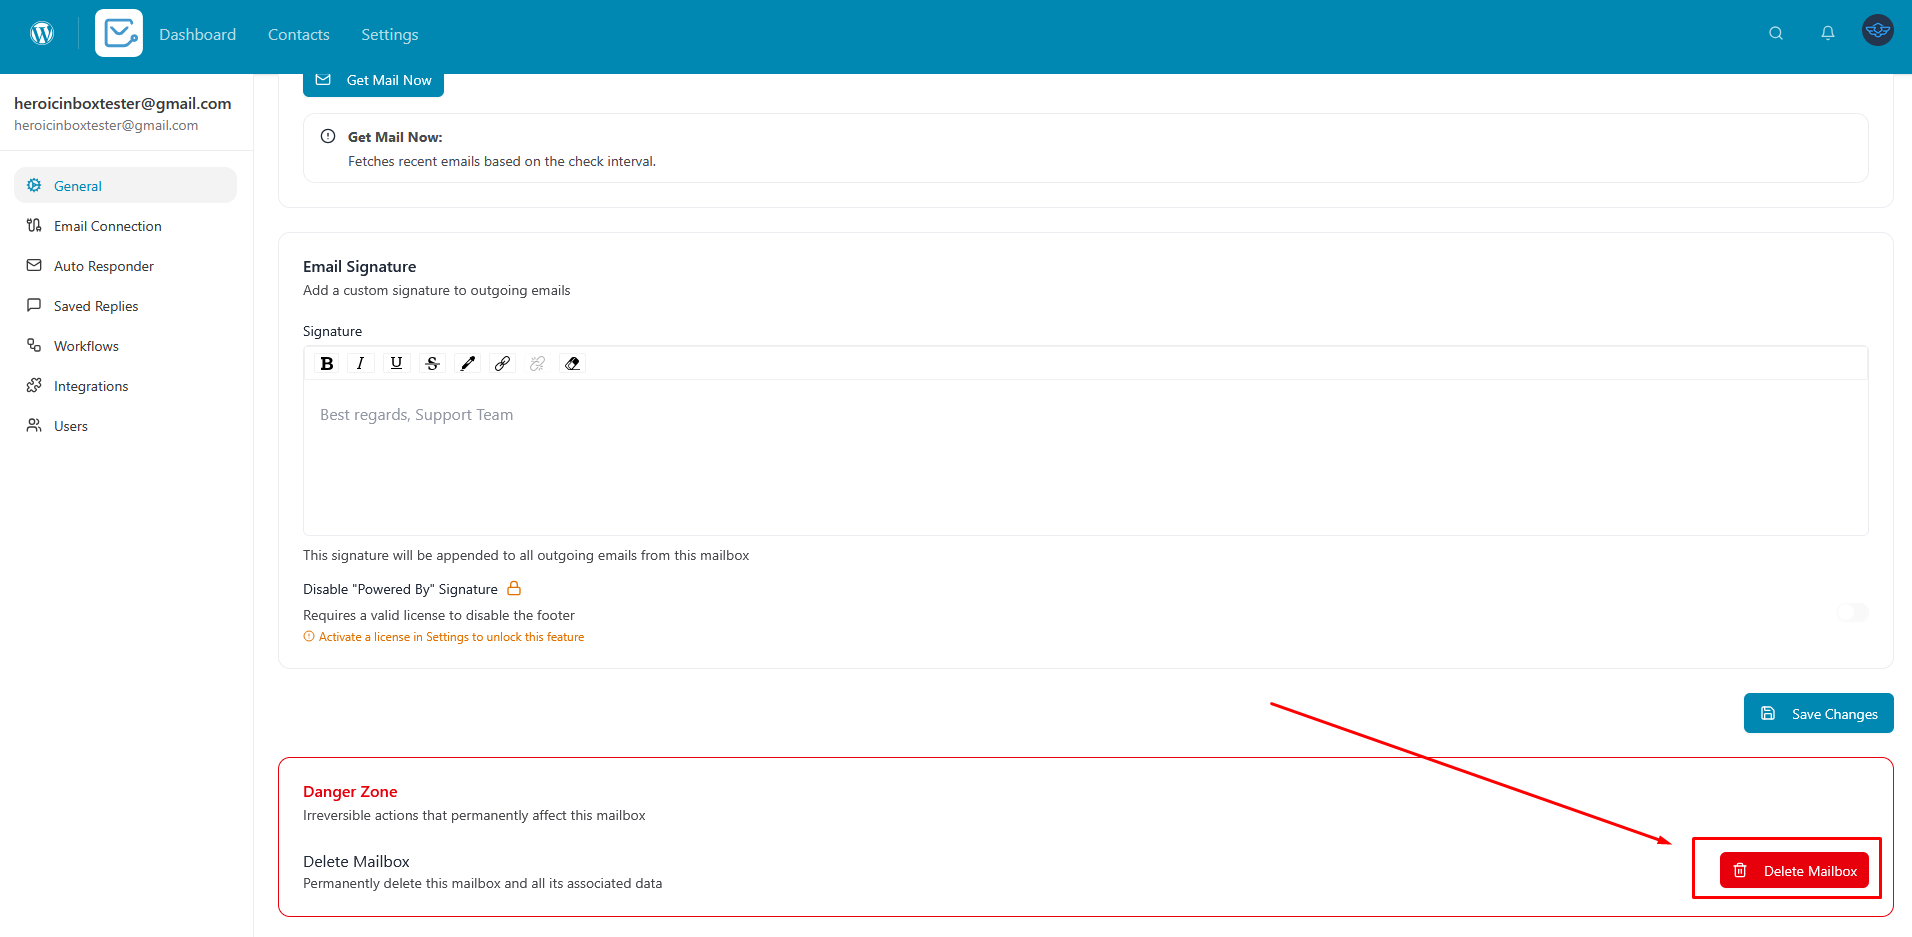
Manually fetch new emails from your mailbox immediately.
How it works:
- Click “Get Mail Now” button
- Heroic Inbox fetches recent emails based on check interval
- Shows notification: “Mail fetched: X new, Y skipped, Z errors”
- Last checked timestamp updates
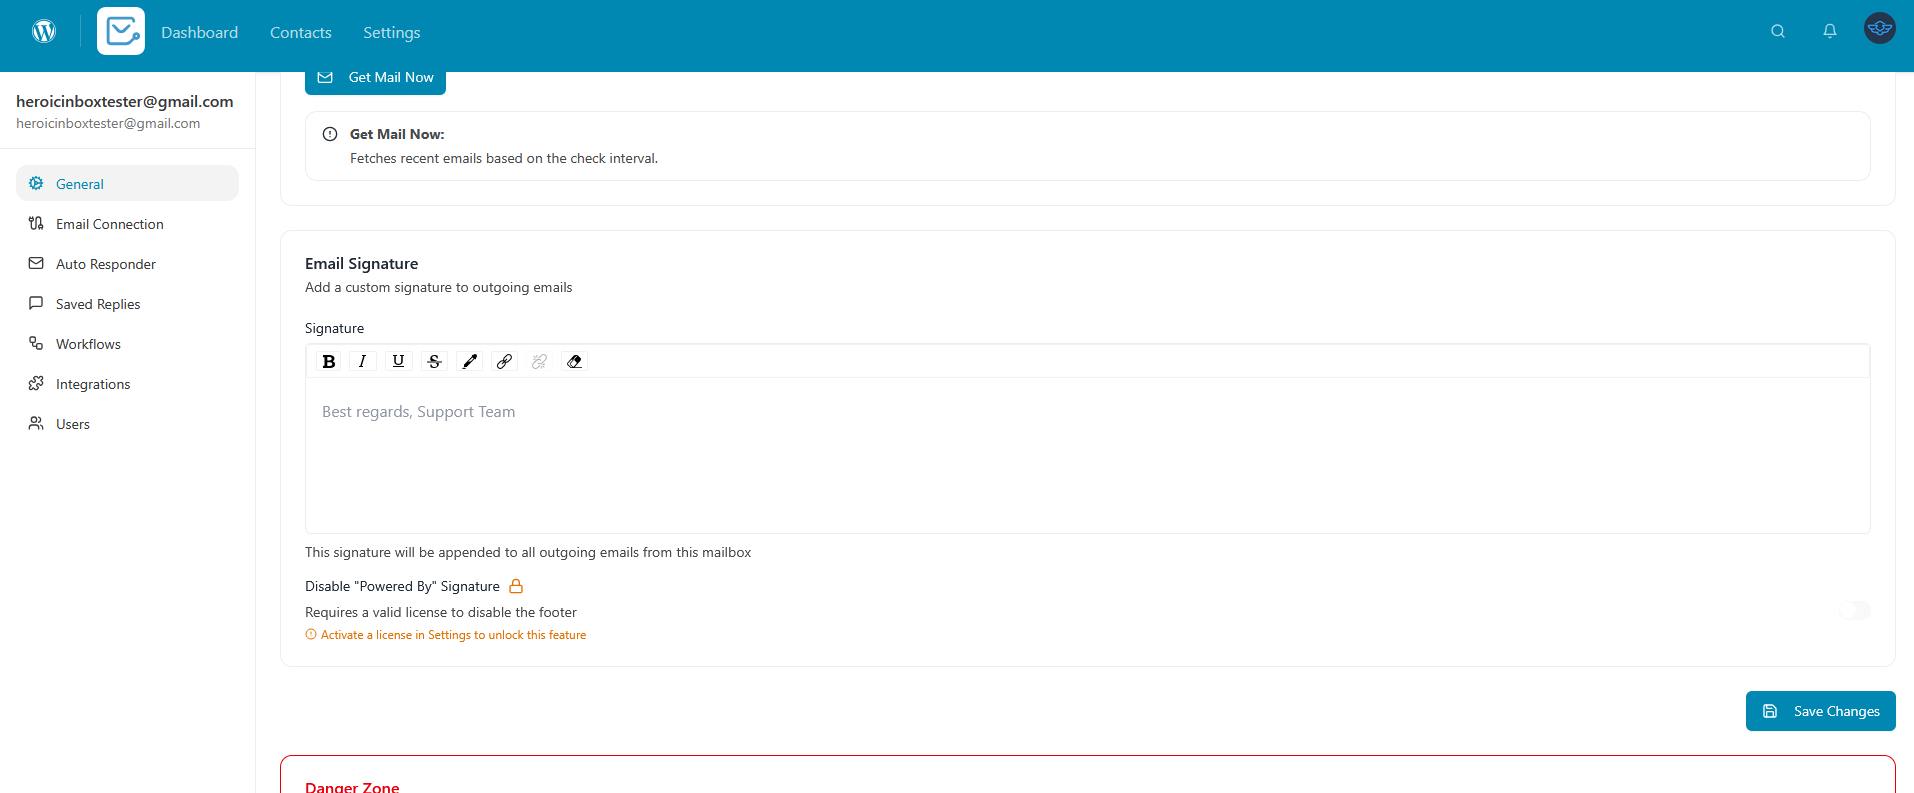
Email Signature
Add a professional signature that appears at the bottom of every outgoing email from this mailbox.
To set up your signature:
- Scroll to the Email Signature section
- Type or paste your signature in the rich text editor
- Use the formatting toolbar to style your signature:
- Bold, italic, underline
- Add links
- Insert images (like your logo)
- Create lists
- Click Save Changes
Delete Mailbox
Permanently remove the mailbox and all its tickets.
Warning: This action cannot be undone!
To delete:
- Scroll to bottom of General tab
- Click “Delete Mailbox” button
- Confirm deletion in the dialog
What gets deleted:
- The mailbox configuration
- All tickets associated with this mailbox
- All ticket replies and notes
- Cannot be recovered
Important: Only Mailbox Admins can delete mailboxes.
Email Connection Settings
Manage your mailbox connection details and authentication.
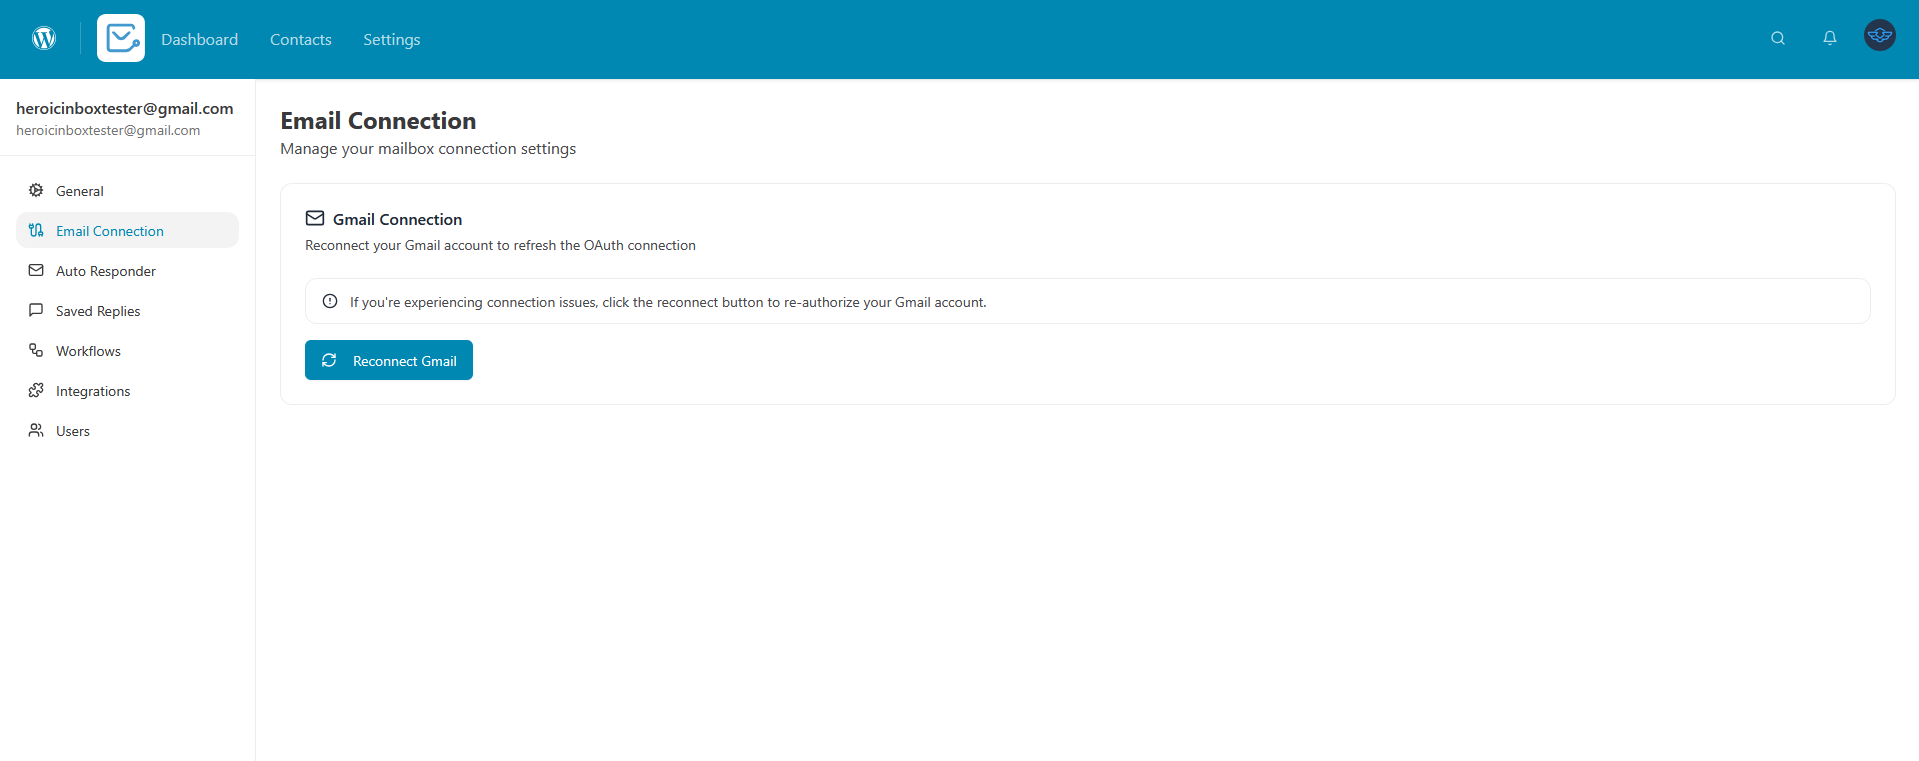
For OAuth Mailboxes (Gmail/Outlook)
Connection Status
- Shows whether your mailbox is connected
- Displays authentication status (green = healthy)
- Shows last sync time: “Last synced: 2 minutes ago”
Reconnect Mailbox
- If your OAuth connection expires or has authentication issues
- Click “Reconnect” button
- You’ll be redirected to re-authorize with Google or Microsoft
- Your emails and tickets remain intact
When to reconnect:
- You see authentication expired errors
- Emails stop syncing
- You changed your Google/Microsoft password
- OAuth token expired (typically after 6-12 months)
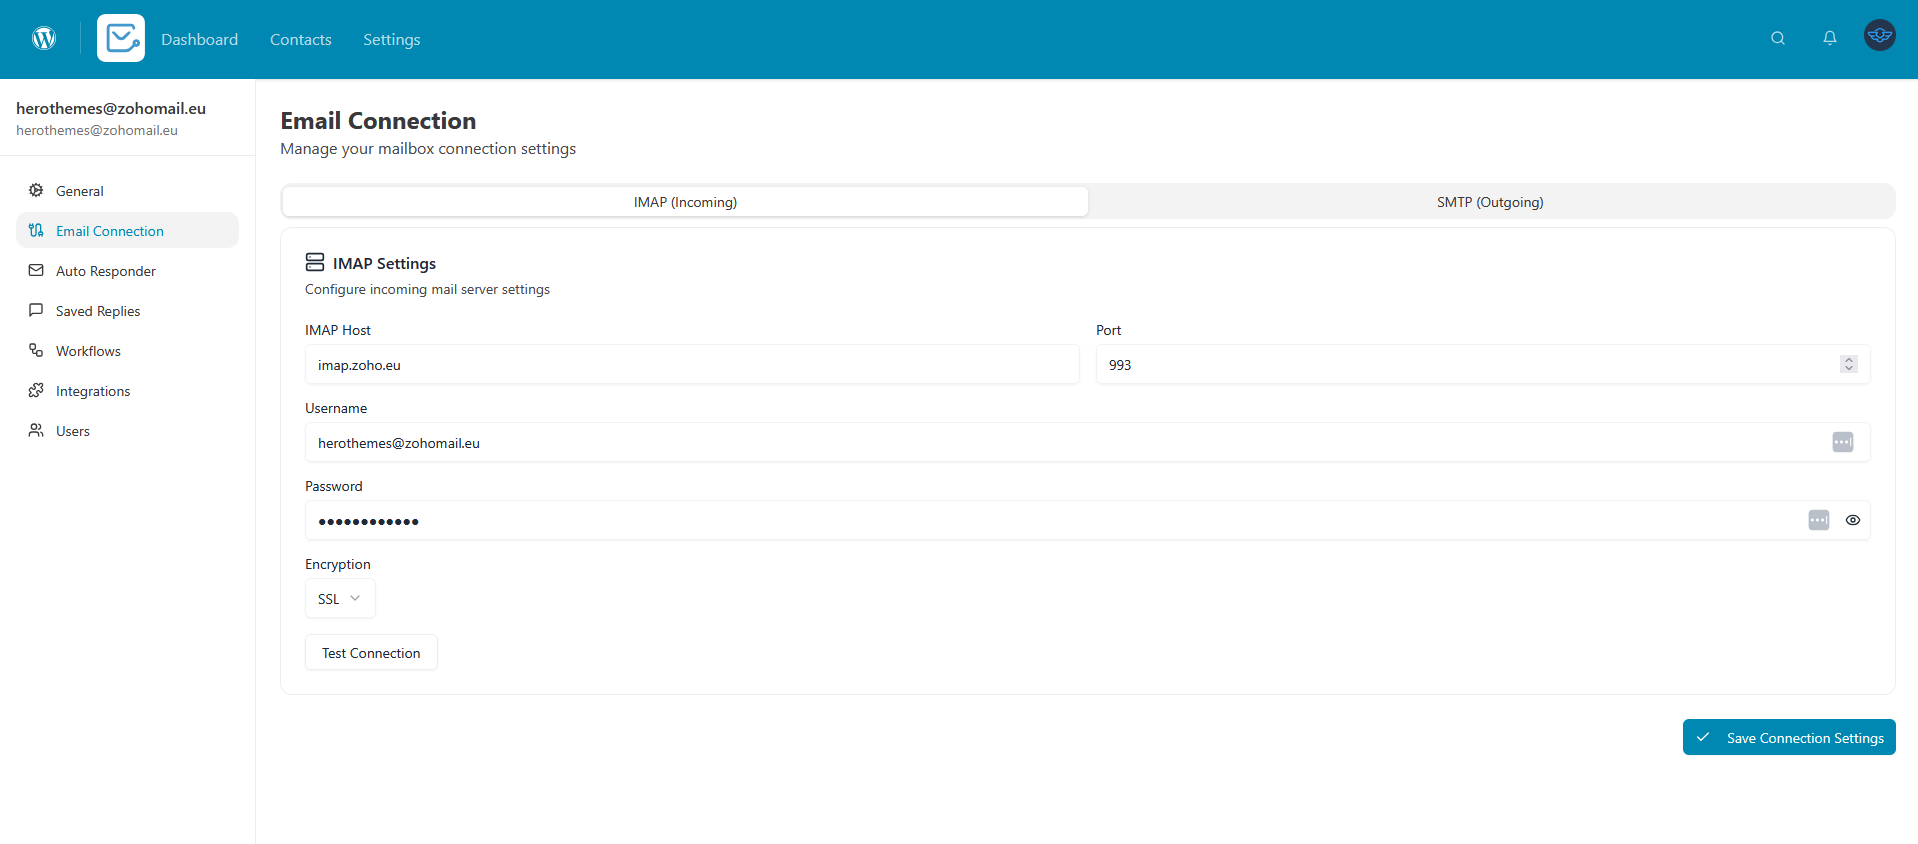
For IMAP/SMTP Mailboxes
View and update your IMAP/SMTP connection settings.
IMAP Settings (Incoming Mail)
- Server address (e.g., mail.sunshineapparel.com)
- Port number (993 for SSL, 143 for TLS)
- Encryption type (SSL/TLS)
- Username
- Password
SMTP Settings (Outgoing Mail)
- Server address
- Port number (465 for SSL, 587 for TLS)
- Encryption type (SSL/TLS)
- Username
- Password
To update settings:
- Modify any field as needed
- Click “Test Connection” to verify
- If successful, click “Save Changes”
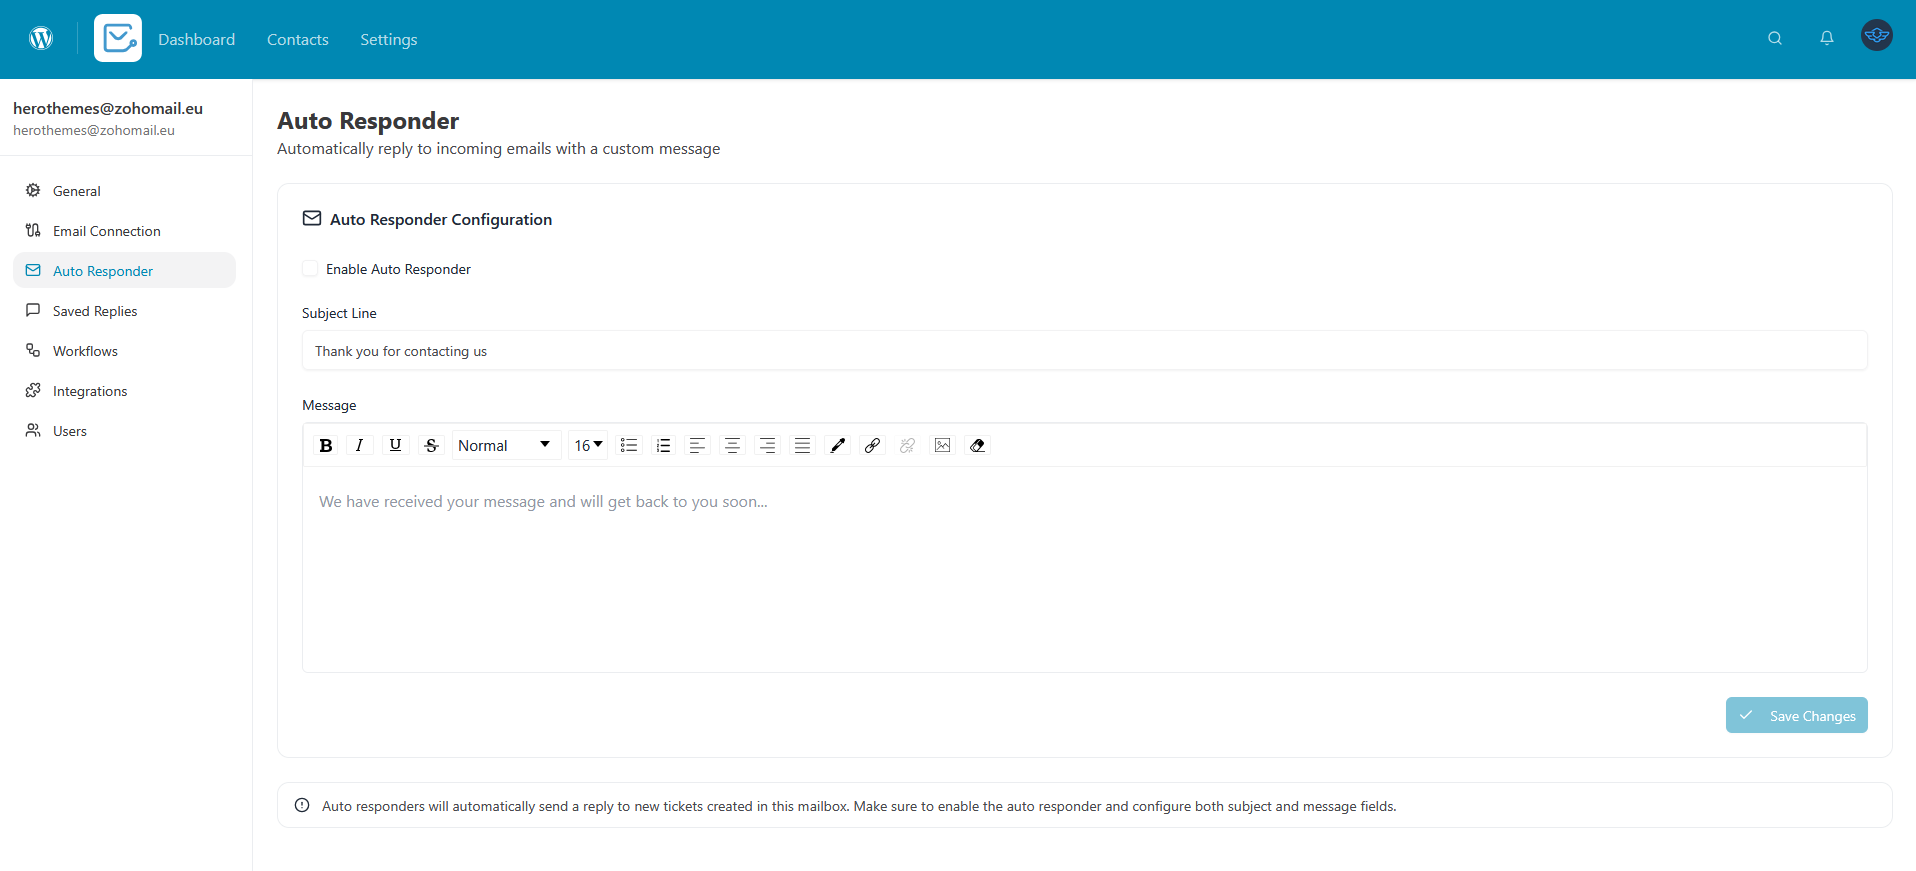
Auto Responders
Automatically send a reply when customers email your support address.
Setting Up an Auto-Responder
- Go to Settings → Auto Responder tab
- Toggle “Enable Auto Responder” to ON
- Configure your auto-responder:
Subject Line
- Customize the subject (e.g., “We received your message!”)
- Leave blank to use “Re: [Original Subject]”
Message Body
- Write a friendly acknowledgment message
- Let customers know when to expect a response
- Use the formatting toolbar to style your message
User Permissions & Roles
Control who can access this mailbox and what they can do.
Available Roles
Mailbox Admin (Full Control)
- Configure mailbox settings
- Add/remove users
- Delete mailbox
- Manage all tickets
- View all folders
Mailbox Manager
- View and manage all tickets
- Assign tickets to agents
- Access all folders
- Cannot modify mailbox settings
Mailbox Agent
- View tickets in Inbox and assigned tickets
- Reply to customers
- Add internal notes
- Cannot access mailbox settings
- Cannot delete tickets
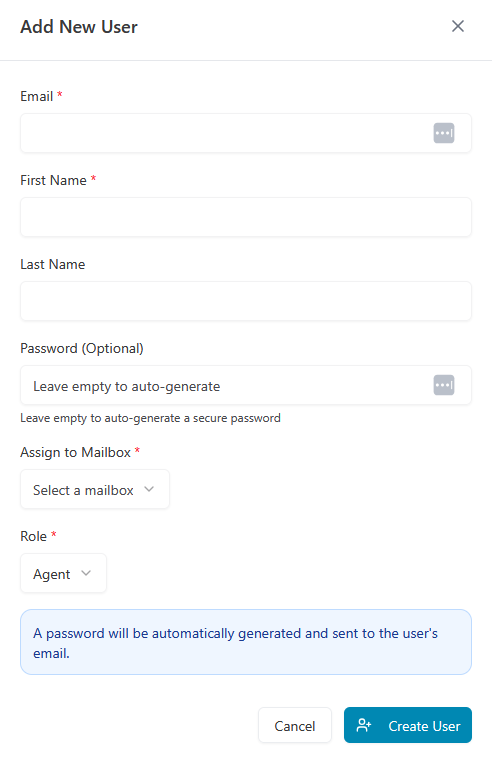
Adding Users to a Mailbox
- Go to Settings → Users tab
- Click “Add User” button
- Search for the WordPress user by name or email
- Select their role from dropdown:
- Admin
- Manager
- Agent
- Click “Add User”
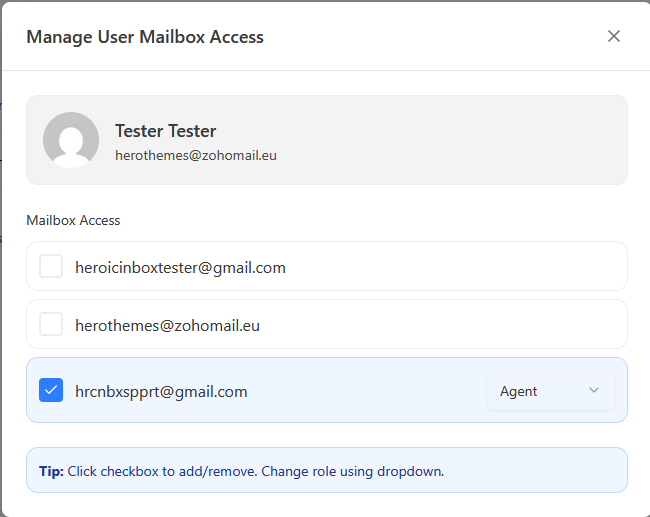
Changing User Roles
- Go to Settings → Users tab
- Find the user in the list
- Click the Role dropdown next to their name
- Select the new role
- Changes save automatically
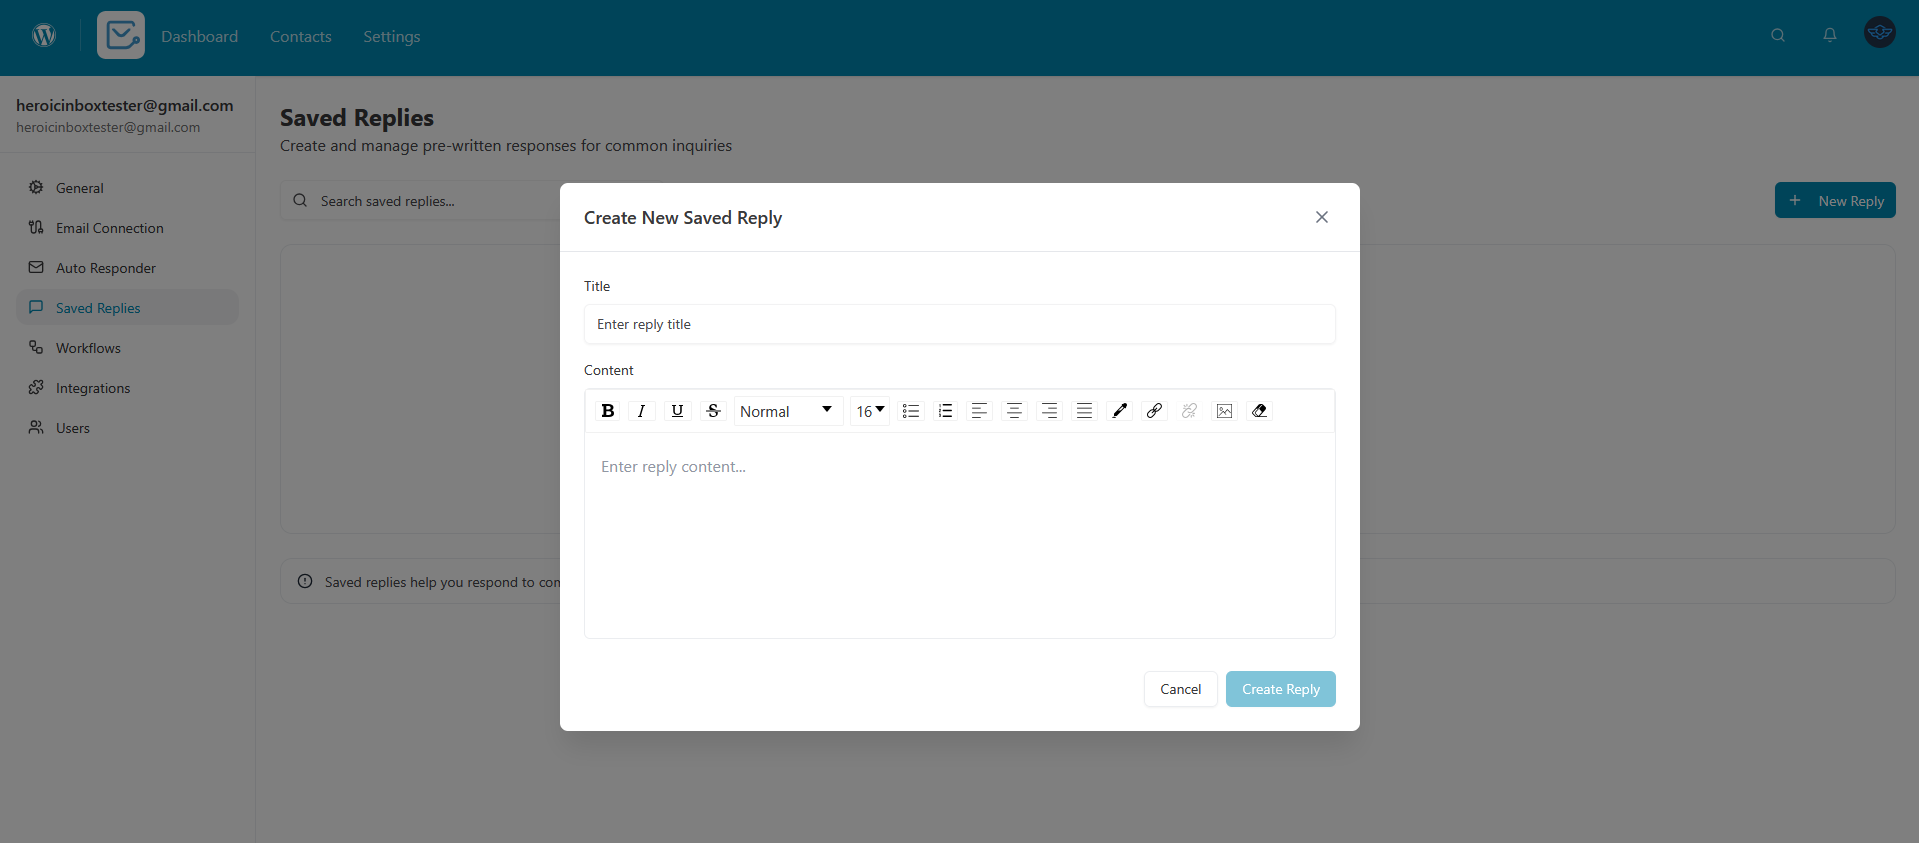
Saved Replies (Canned Responses)
Create reusable message templates to respond faster to common questions.
To access:
- Go to Settings → Saved Replies tab
- Click “Add New Saved Reply”
- Create your templates
Fields:
- Title: Name your template (e.g., “Refund Policy”)
- Content: Write your pre-formatted response with placeholders
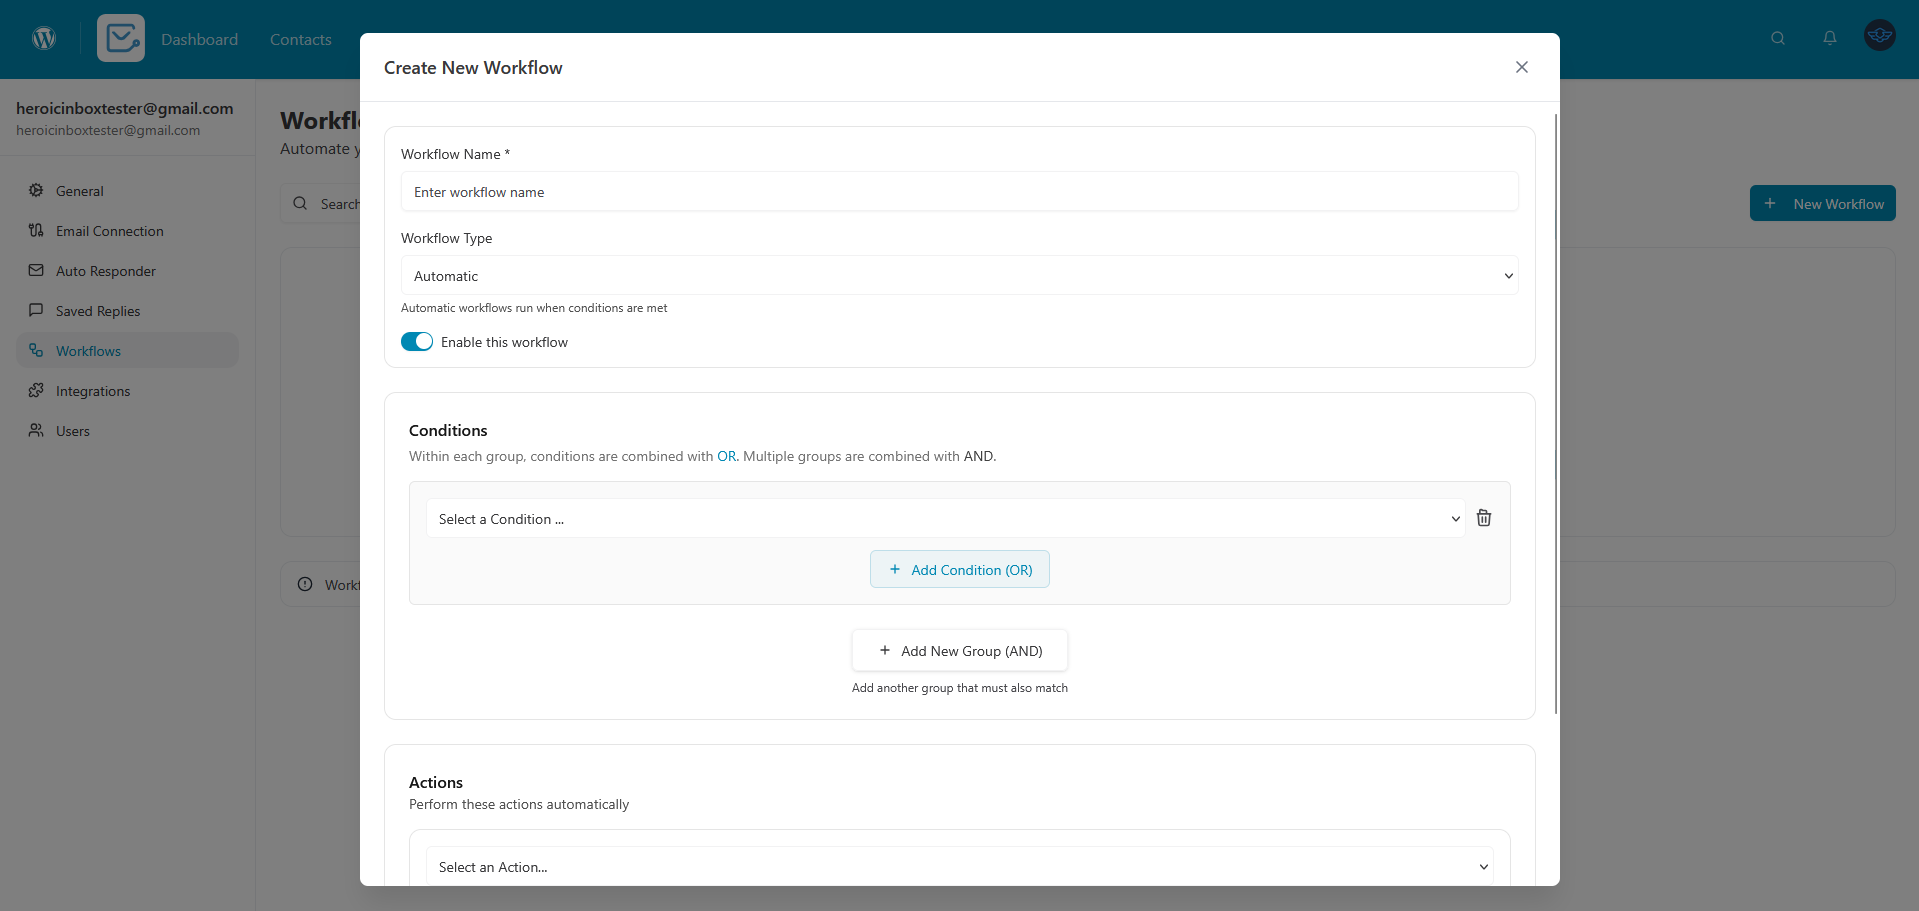
Workflows & Automation
Automate your support workflow with if-this-then-that rules.
To access:
- Go to Settings → Workflows tab
- Click “Create Workflow”
- Build your automation rules
Example Workflows:
- “If subject contains ‘refund’, assign to Billing Team”
- “If customer is VIP, add ‘Priority’ tag”
- “If email contains ‘cancel order’, change status to Pending”
Integrations
Connect Heroic Inbox with other plugins for enhanced functionality.
Available Integrations
WooCommerce
- View customer lifetime value
- See recent order history
- Display purchase information in ticket sidebar
- Show order status and details
Easy Digital Downloads (EDD)
- Show customer purchase history
- Display license keys
- View subscription status
- See download history
To enable integrations:
- Go to Settings → Integrations tab
- Toggle the integration ON
- Configure any additional settings if needed
- Click “Save Changes”