The site title and tagline are two key things within your WordPress website. Basically, the site title will be considered as your website name whereas the tagline is usually a brief sentence about the website.
These two serve as an introduction to your website content or else point out what your website is all about in quite a brief way. Usually, these are located within the top left position within your website but the position may vary depending on the theme you are using. Below is a sample:
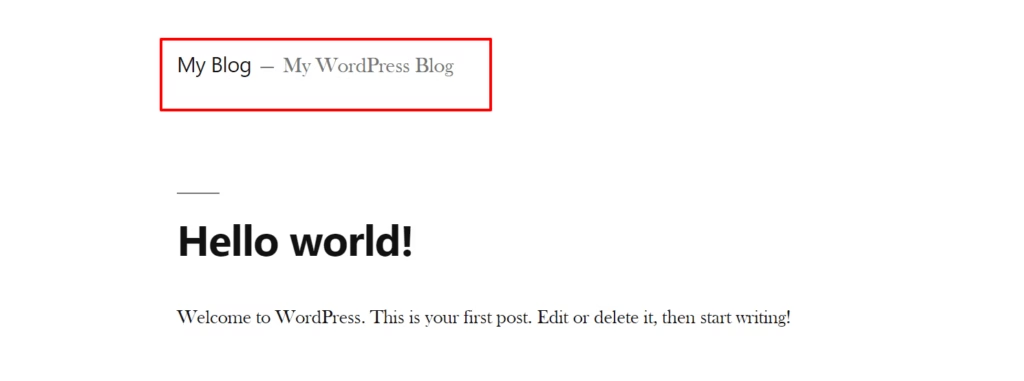
In the above screenshot, our site title is “My Blog” and the Tagline is “My WordPress Blog”.
Both the site title and tagline are quite relevant especially when it comes to Search Engine Optimization (SEO). It’s therefore important to have a strong and catchy title and tagline.
Within this article, we will explore some of the ways on how to go about altering these two items.
1. Changing from the General section
As for this option, you will need to first navigate to your website dashboard. By default, this is under the link yourdomain/wp-admin or yourdomain/wp-login.php if you have not altered the default WordPress end-points.
Here, you then need to navigate to the Settings > General section. Below is a screenshot on this:
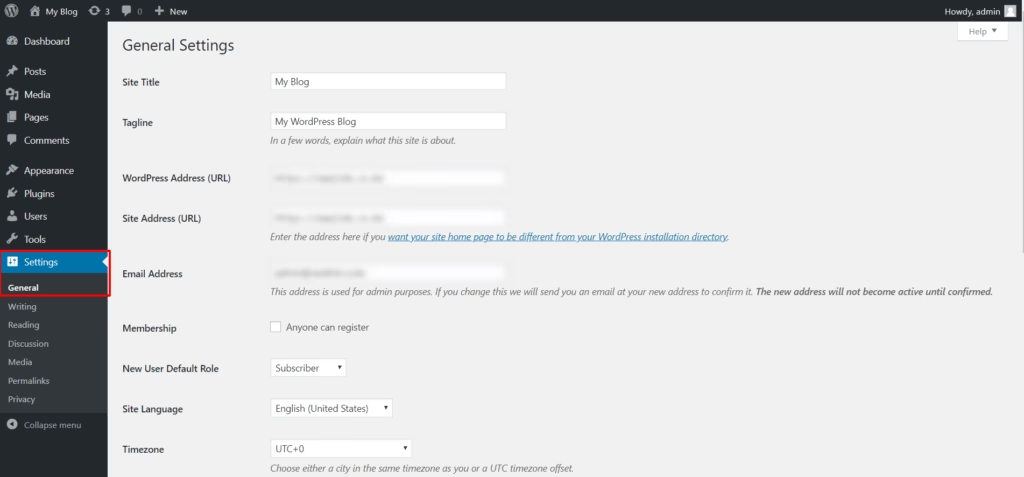
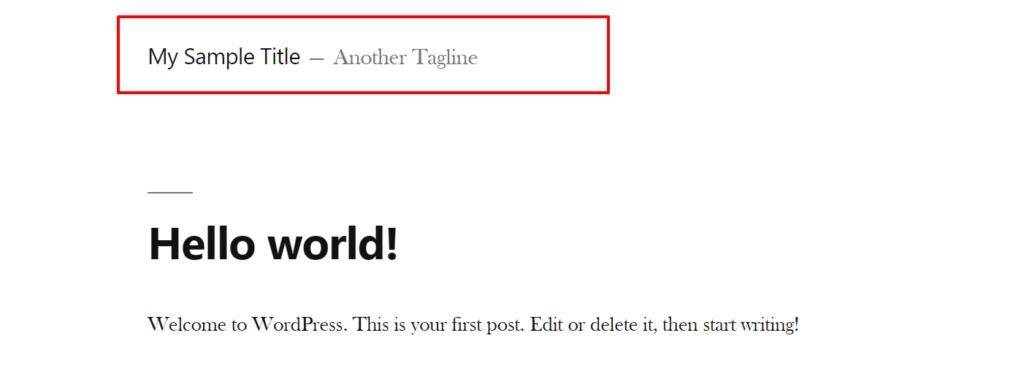
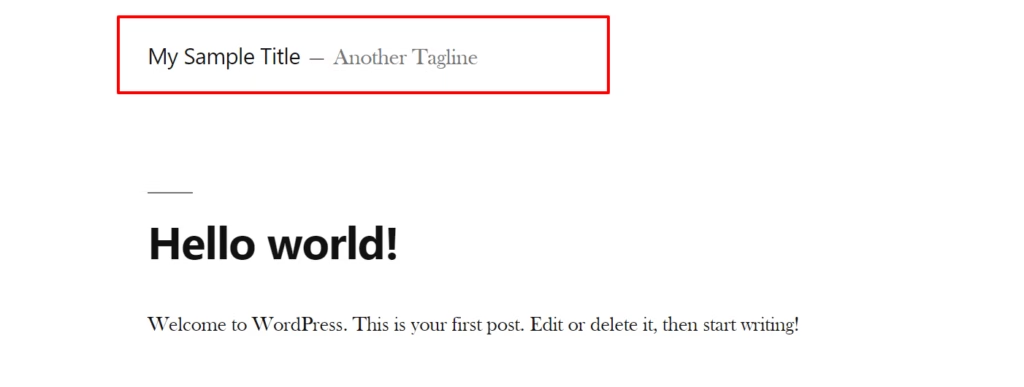
Within the section, you will trace the fields “Site Title” and “Tagline”. It is here that you can now specify your own text. Within this article, we will have the site title set to “My Sample Title” and the Tagline set to “Another Tagline”, from the currently specified “My Blog” and “My WordPress Blog” respectively.
Once you have altered the text in place, click on the “Save Changes” button on the bottom of the page and visit your site URL to check if the changes are reflected. Below is a sample output:
2. Modification from the Customizer section
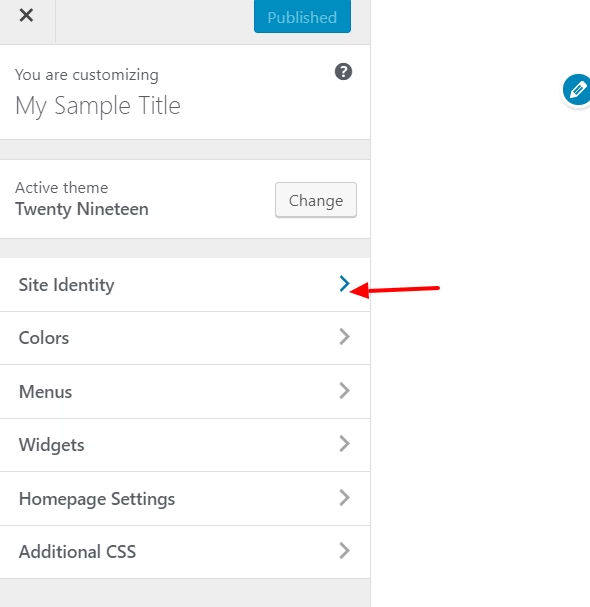
Within your WordPress dashboard, you will need to:
- Navigate to the Appearance>Theme section
- Click on the Customize button within your theme.
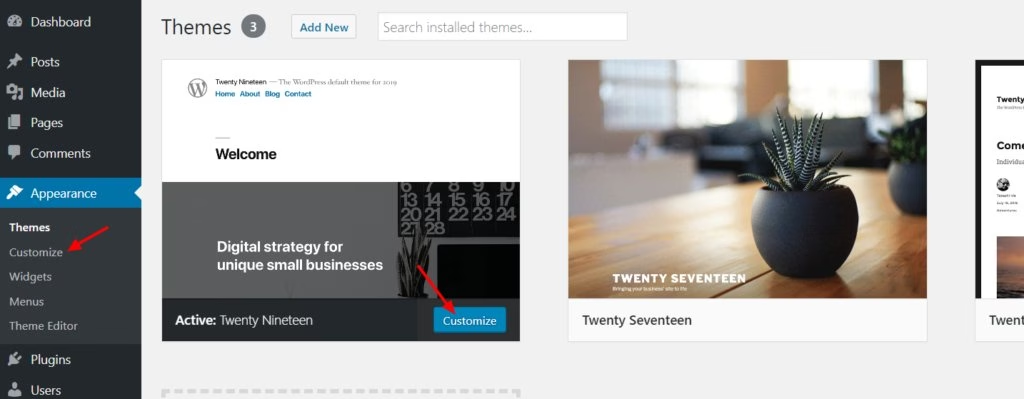
Once on the customizer screen, click on the Site Identity section and you should then have a view of the “Site Title” and “Tagline” sections.
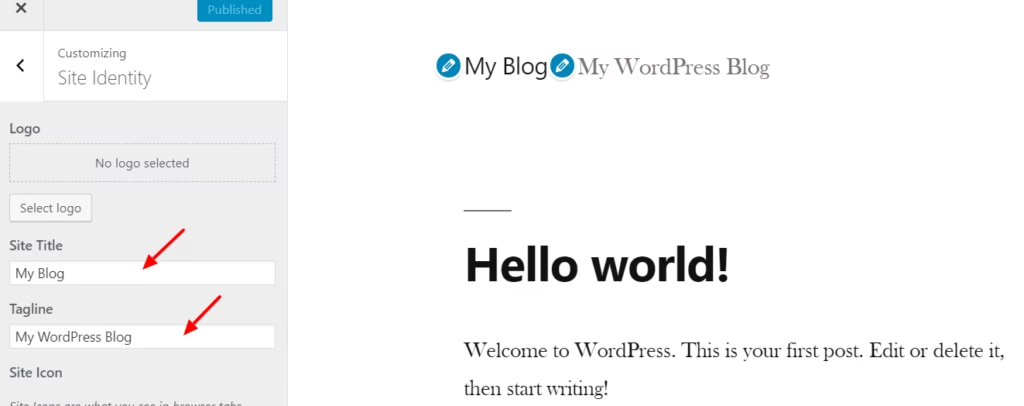
You can then alter the text in place to that of your preference. In our case here we will alter the text in place and instead have the site title set to “My Sample Title” and the Tagline set to “Another Tagline” and publish the changes.
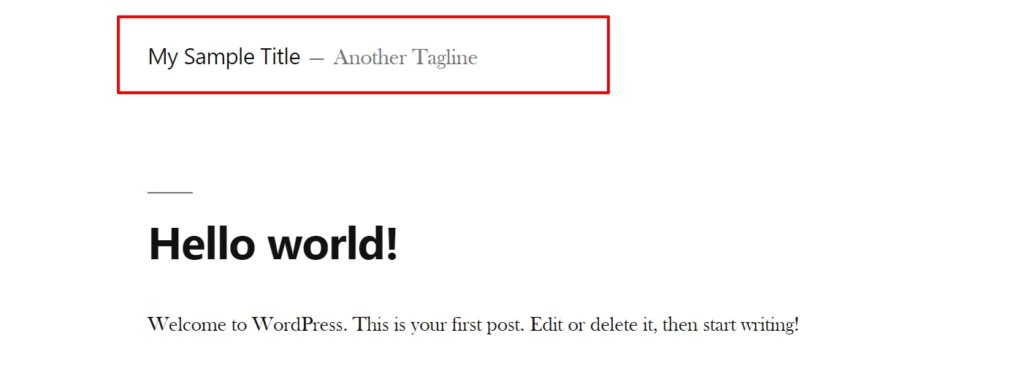
Once this is done, you can try accessing your website URL and it should render the changes on the front-end:
3. Changing from the Database.
Altering the values from the database can also serve as another approach in carrying out these changes. However, in very rare cases would you need to apply this method as the other methods are quite more convenient for such an action.
This article section assumes that you are using cPanel as your control panel. In case you are using another control panel provided by your host, you can consult them on how to navigate through the sections mentioned below.
Here I would recommend on following up on the steps below:
Identifying your database name: One of the ways to identify this is from your wp-config.php file, which is a file located within the root of your WordPress files.
Within it, you should have a line that would follow the format:
define('DB_NAME', 'newlinkc_wp121');In this case, our database name is newlinkc_wp121. In your case, this will be a
different value.
Access your cPanel account, of which in most cases would be domainname/cpanel, and within the “Databases” section, click on phpMyAdmin.

This will then lead you to the phpMyAdmin section where you will now be in a position to view the database.
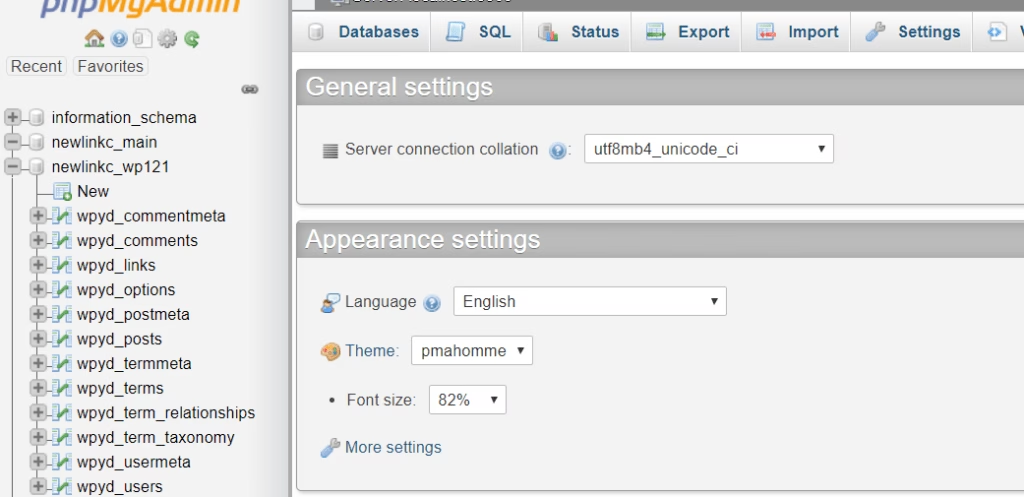
You can then click on the options table. In most cases, the table will be named as wp_options.
In our case here, there is a prefix in place, therefore, the table name reads as wpyd_options. Within the table, you should trace the fields “blogname” and “blogdescription”.

These two fields represent both the site title and tagline respectively.
Here you can then click on the “edit” link within the “blogname” and fill in your site title and on the “blogdescription” edit link section to fill in your tagline.


Once this is done, save your changes by clicking on the “Go” button.
You can then visit your website URL and see if the changes are reflected:
Conclusion
These are the different ways we can alter the tagline and site title in WordPress.
All the three options above are recommendable but the second option has fewer steps and you are in a position to preview the changes prior to having them published. It’s however up to you to determine the approach you would be comfortable with.