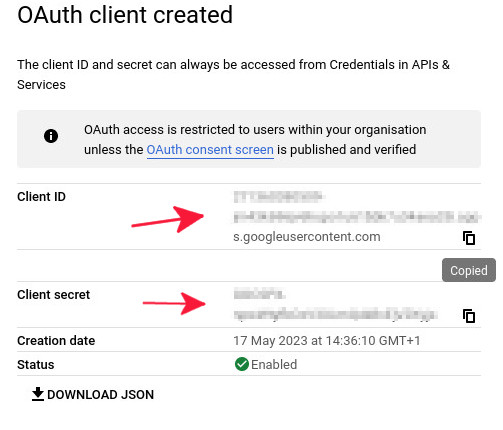
The Heroic Inbox plugin requires a Google App to access Gmail inboxes, send and receive mail on behalf of the plugin.
Once the App creation is complete, a Client ID and Client Secret will be generated, which can be entered in the Heroic Inbox setup assistant during installation.
1. Register a New Project
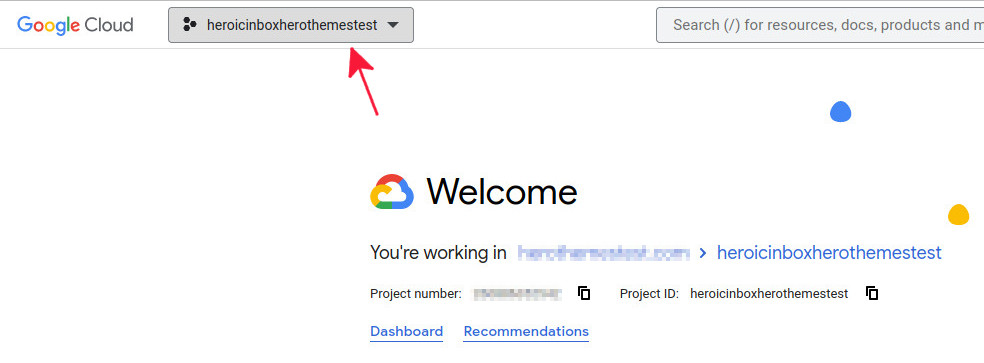
Log into the Google Cloud Platform, click the Select a Project dropdown (the current project name may already be selected) to show the Projects in the current organization.
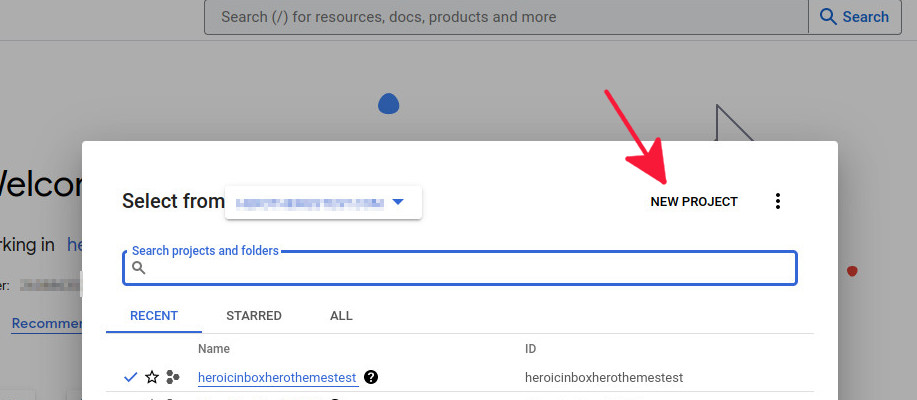
In the project management dialog, click NEW PROJECT.
Give the project a descriptive name such as Heroic Inbox Project and click CREATE.

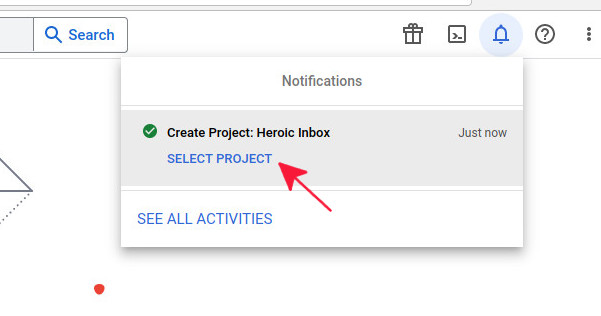
In the notifications area, select the new project to switch to management of the new project.
2. Enable the Gmail API
Now the project has been created, the Gmail API needs to be enabled.
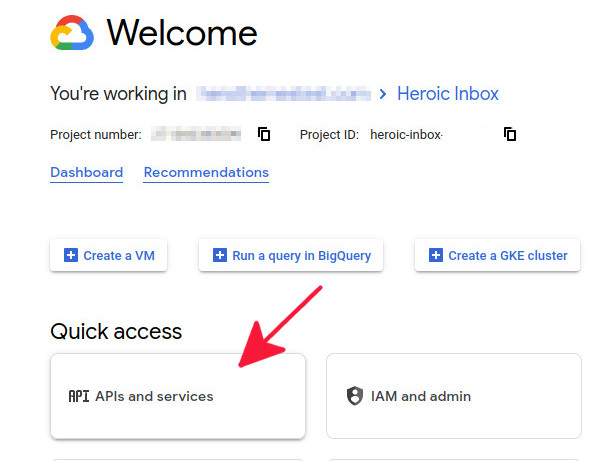
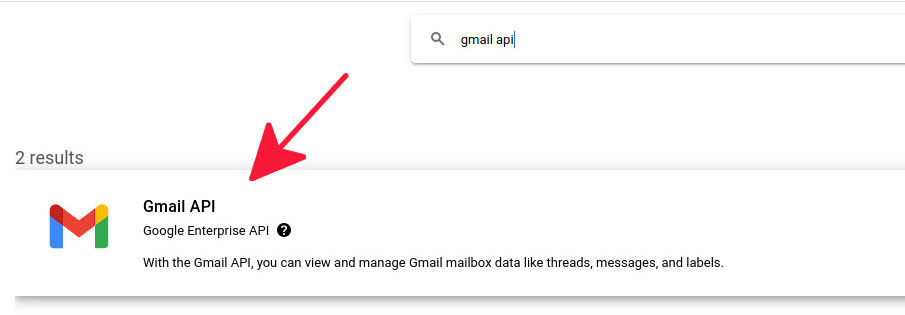
In the APIs and Services tab or Quick access shortcut, click APIS AND SERVICES, then search for Gmail.
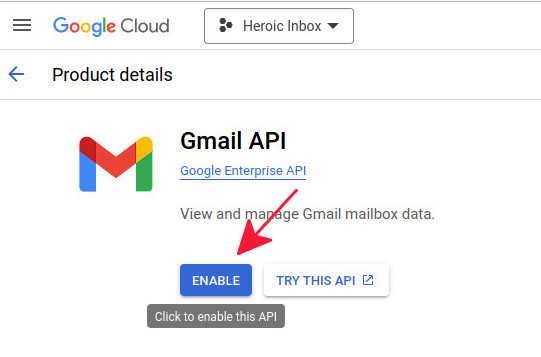
Select the Gmail API and click ENABLE to activate.
3. Create Credentials
Once you’ve activated the Gmail API, you’ll need to create OAuth credentials.
1. Configure OAuth consent screen
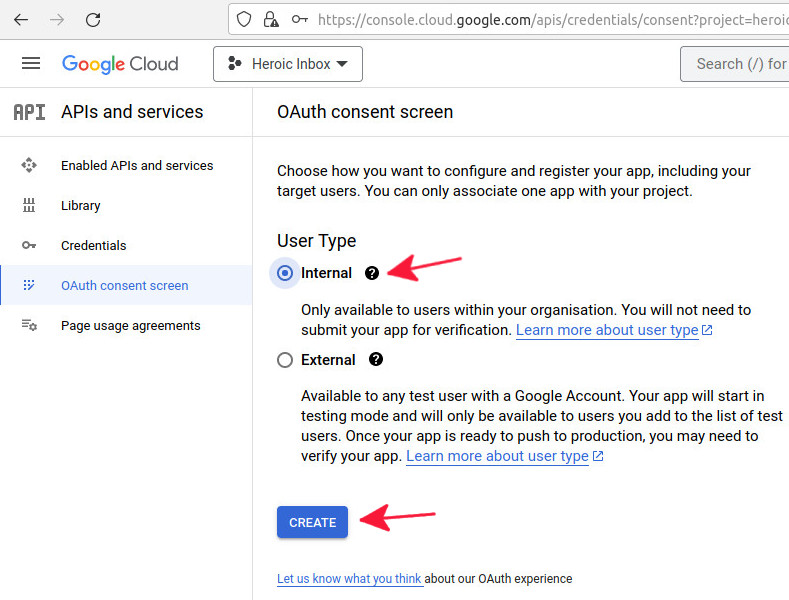
You first need to create an OAuth consent screen, this will be displayed when you allow Heroic Inbox to access Gmail messages.
In the OAuth consent section, select the user type as Internal – this permits the app to access any accounts within the organisation. Click Create
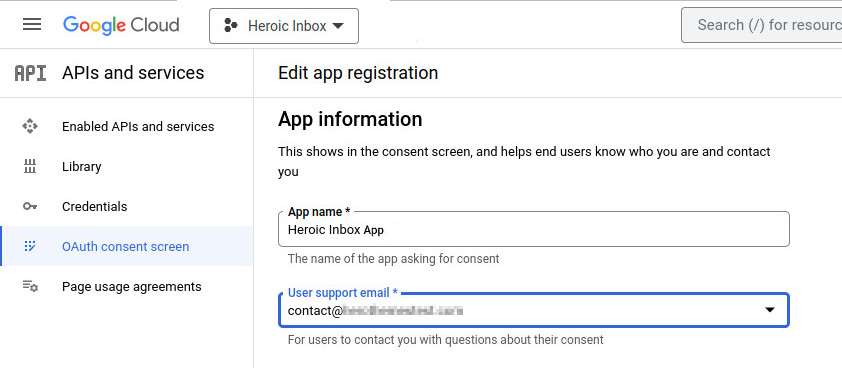
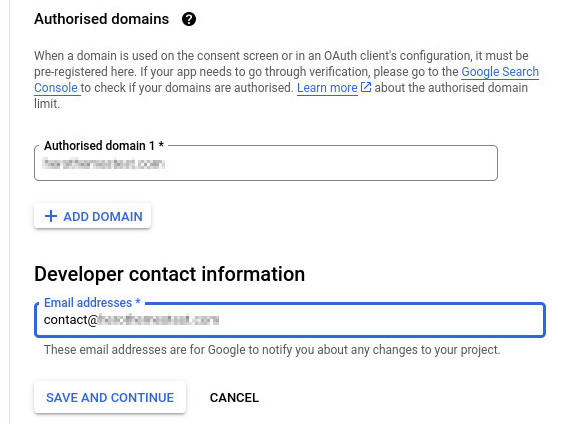
In the App Information section set a meaningful App name, such as Heroic Inbox App. From the User support email dropdown, pick an appropriate contact email. The same Email address can be used in the Developer contact information section.
Enter the URL of the site the Heroic Inbox plugin will be used on in the Authorised domains section. All the other sections (not marked with *) do not need to completed.
2. Scopes
Nothing needs to be changed from the default in the Scopes section, this will be set automatically by the App on first use.
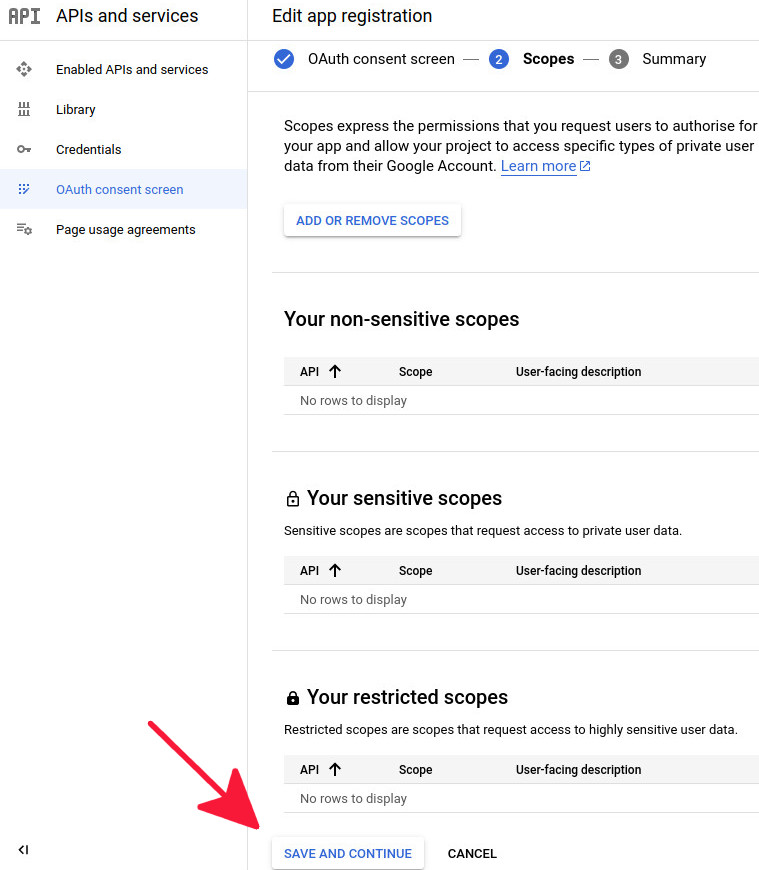
A summary will be displayed, review this and click to go back to the Google App dashboard.
3. Create OAuth Client ID
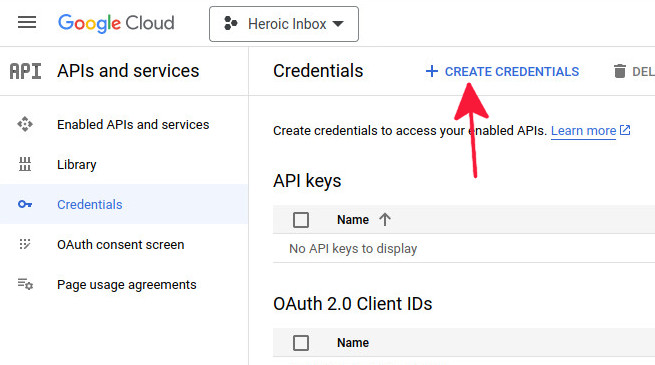
In Credentials Section click CREATE CREDENTIALS.
Next, select Web Application as the Application type.
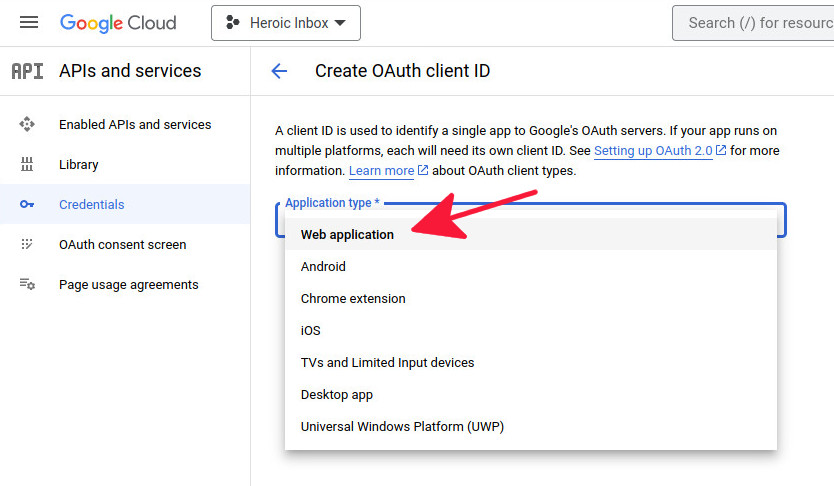
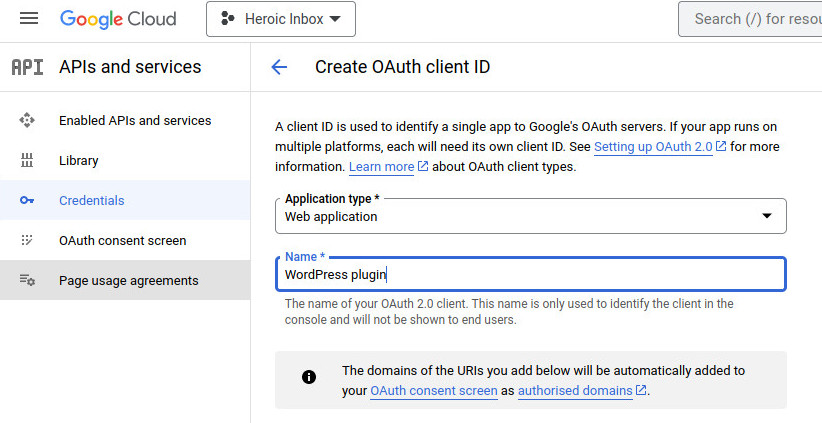
Inthe OAuth Client ID section, select the Application type as Web application from the dropdown. Give the client a meaningful Name, such as Heroic Inbox WordPress Plugin.
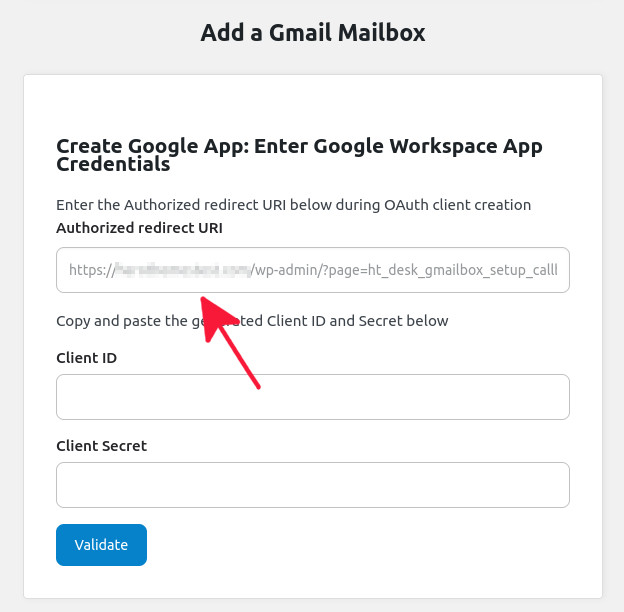
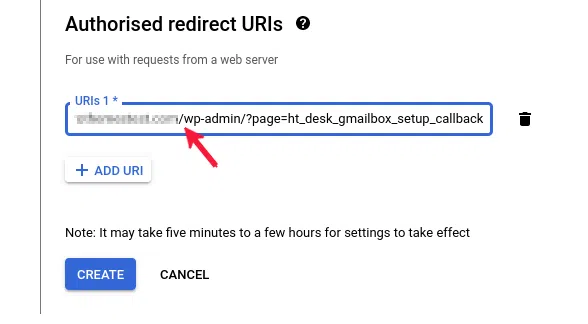
Switch back to the Heroic Inbox setup assistant screen, which may look similar to the screen below to obtain the Authorised redirect URI.
The authorised redirect URI, if not displayed, is in the form example.com/wp-admin/?page=ht_desk_gmailbox_setup_callback where example.com should be substituted for your site url.
5. Obtain Credentials
Once the client has been created a dialog will appear. Copy the Client ID and Client secret into Heroic Inbox setup assistant and continue with remainder of the setup process.
