As a WordPress user, you may have come across this error a couple of times:
 This, in turn, renders the WordPress dashboard inaccessible.
Within this article, we will discuss what causes it, the various ways on how to go about resolving the error as well as ways you can avoid the error.
What Causes the Error
First and foremost, seeing this error is quite normal.
Usually, the error is rendered when you are updating your plugins, themes or even WordPress itself. In these instances, WordPress places your site under maintenance mode, hence rendering the notice.
The message may not be displayed for a long period of time, depending on the number of updates being carried out.
Once the update is complete, then the notice is no longer displayed and you will now be in a position to access your dashboard and Website once again.
In some instances, however, an update may fail or else there may be an interruption to the update process.
In most cases, such scenarios may be attributed to memory issues as well as server timeouts, whereby the update script does not get enough execution time to complete the update process and take your site out of the Maintenance mode.
It is now at this point the “Briefly Unavailable For Scheduled Maintenance. Check Back In a Minute Error.” notice becomes an error and actually lasts quite long until it is fixed.
How to Fix the Error
There are three quick ways on how to go about resolving the error:
The first two methods will involve deleting the .maintenance file. This is a file within the root of your WordPress files, that is added by WordPress automatically once you trigger an update within your website environment.
This is also the file responsible for displaying the error message. Usually, if an update is complete, the file is removed but in cases where the update is incomplete, the file remains and you would need to delete it.
1. Via FTP (File Transfer Protocol)
Here, you would need to use an FTP program such as Filezilla or WinSCP.
In this article, we will have the illustrations using FileZilla.
You will first need to:
- Login to your website via Filezilla. You can consult your host to provide you with your FTP details in case you currently don’t have these in place.
- Access the root of your WordPress files and search for the
.maintenancefile. In case you are not in a position to trace it, please ensure that you enable the visibility of hidden files within Filezilla. To do so, navigate to the “Server” menu and click on the “Force Showing Hidden Files” option. You may check into this screencast on how to go about having this enabled. - Once you have a trace of the file, you can go ahead and delete it.

2. Via cPanel
This is more similar to method 1 above and easier in case you use the control panel provided by your host to manage your site.
What you would need to do here is access the cPanel for your site and use your credentials to log in to it. You can consult your host for these credentials in case you don’t have them.
Once logged in, you need to access the File Manager section:

From here, navigate to the root of your website files (public_html) folder and search for the .maintenance file
If you are not in a position to view the file, ensure that you enable the visibility of hidden files from the “Settings” section. Below is a screenshot on this:

You can then proceed to highlight and delete the file.

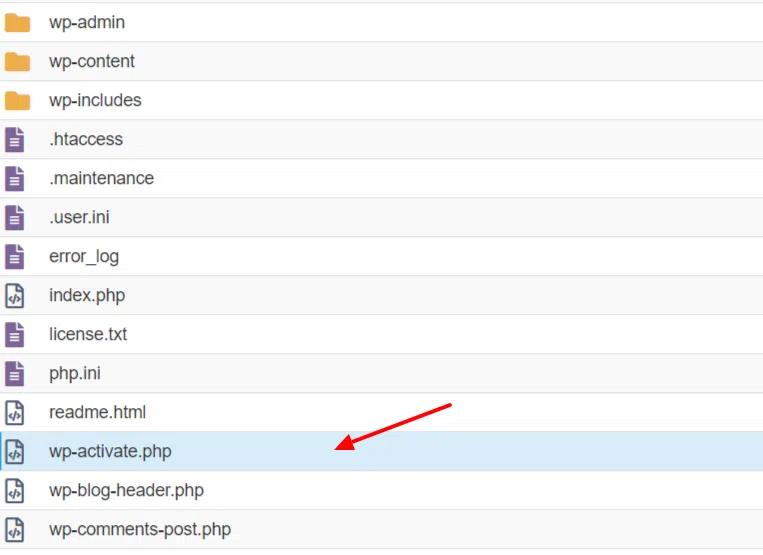
3. Using wp-activate.php
Here, you would again need to access the root of your WordPress files via FTP or cPanel and search for the wp-activate.php file.

Download the file to your local computer and open it with an editor of your choice such as sublime text. Around line 9 of the file, you will find this line of code:
define( 'WP_INSTALLING', true );

Alter the code to:
define( 'WP_INSTALLING', false );
You can then save your changes and upload the file back to the root of your WordPress files and replace the file currently in place.
Once this is done, refresh your website and check whether the error is resolved.
How to avoid the error in future
Some of the ways you can avoid running into this error would include:
- Avoid carrying out multiple updates to plugins and themes at a go. I would recommend updating your plugins or themes one at a time.
- Do not terminate your browser session while carrying out the updates. Ensure that your browser tab is open until the update process is complete and the “briefly not available” notice is not displayed.
- Upgrading your hosting plan. This would enhance the hosting performance especially in terms of allocation of resources.
Conclusion
In any case, the methods above do not work out for you, or else you would not wish to carry out these changes yourself, I would recommend on consulting your hosting provider on this so that they can assist you on this.