Restricting Access to WordPress Pages & Creating a Members Area


Are you looking to build a member’s only area for a WordPress website?
There are so many ways of restricting access to WordPress content.
And depending on what you want to achieve – there are literally hundreds of methods to choose from.
And they’ll do everything from helping you set up a simple log-in area to launching an online community.
The trouble is…deciding on which is the right solution for your project.
So, if you are still working out the best way to:
- add restricted access to site content inc. pages, video pdf etc;
- give members-only access to pro subscription services with billing, for example;
- offer premium products behind a secure, paywall system
(Or, if you have something more sophisticated or even simpler in mind…)
This guide is for you.
Here’s everything you’ll learn:
- What a members-only restricted access area looks like
- Restricted WordPress pages and how they work
- Skills needed to set up a restricted area members-only website
- Case Study: WordPress restricted area members-only
- The quick set-up
- Build your member’s only area
- Methods of restricting pages
- Generate User feedback
- Help desk integration for better member satisfaction
What exactly is a members-only area with restricted access?
A members-only area of a website is made up of pages that hold content which are accessed by permission only (granted by the site administrator).
The site structure (how these pages link together) should favour users discovering what they need quickly and accurately.
It is generally accepted by web experts that a flat site architecture works best.
i.e. one where the content the user wants to find is easily found and isn’t deeply buried.
Here’s a model example of what an effective flat site architecture might look like:

(Source: Backlinko)
The golden rule governing flat site architecture says that pages should never be more than 2 clicks away from the home page.
Plus, the link to the any desired page should be easy to find on the referring page.
Features like: automated related article links, listed categorical homepage links, breadcrumb link, related page sidebar links, jump links to relevant sub-headings etc…achieve this goal well.
Though the most critical page to get right in this kind of set-up is the homepage. This is because it acts as a gateway or hub for accessing all other content on your site. It’s often where the journey begins (and also where you should go if you get lost.)
Flat site architecture is a best practice approach that leads to optimal user experience leading to retention of membership accounts.
Definitely worth sticking to.
Want a frontend example of how that would look?
Take this example from Barn2 Plugins, they’re a premium WordPress and WooCommerce plugin company.
The screenshot below is of their custom designed Plugins Knowledge Base for users (they used the Heroic Knowledge Base Plugin to achieve their result):

(Source: Barn2 Plugins)
I’m sure you’d agree – an inviting set up.
No matter the context of your members-only area:
- online training courses
- client billing area
- family blog
- intranet for colleagues
…it’s obvious how a simple, yet effective, presentation like this would serve your site members (or subscribers) beautifully.
How restricted website content works
Restricting content on a WordPress website can be done simply.
The simplest way is using password protection on selected pages.
This bypasses the more invasive registered user only access and can be adequate under some basic circumstances.
But where registration is required, you can achieve this more complex functionality by plugin.
Thankfully, most ‘restricted access’ plugins have this registration process integrated. It comes inclusive.
Here’s what the log in or sign-up form would look like:

(Source: Pippin’s Plugins)
Once complete, secure login details (e.g. username and password credentials) are issued to the new user granting them access to restricted pages.
The registration page can be customised with bespoke touches, like logos etc to give a more tailored experience.
If you require a payment gateway integration with Stripe, PayPal or other services is a regular feature with the majority of plugins.
Further useful add-ons will include: expiry date set-up on membership and automated reminder emails for renewal etc.
The skills needed to set up a restricted area members-only website using WordPress
WordPress is versatile – perfect for beginners and developers alike.
For beginners, it’s easy to get started using the platform. Even if you’re setting up a fully-functioning membership site – coding is not necessary.
At the same time, if you have a developer working on your project, WordPress and its premium plugins are extensible. So, you won’t be restricted in applying customisations either.
WordPress restricted area members-only: case study
As with any practical exercise, building a members-only area is made much easier when we have an example to follow.
A solid standard to model might be the Smart Insights website.

If you don’t already know, Smart Insights is a leading online training provider for marketing professionals, led by the best selling author Dr. Dave Chaffey.
Their training business serves 150,000 members who all gain their subscription value by accessing content via the Smart Insights ‘members-only’ web portal.
Their site is built using WordPress.
Not too long ago, Dr. Dave and his team radically upgraded their member’s area.
And in true content marketing authoritative style – blogged on their success story.

The article is called:
“What’s new in our upgraded members’ area? A guide to the 5 main new features.“
To summarise the reason for their member-only area upheaval, Dr. Dave mentions his team was prompted to make the changes following…
“…frustrations with the UX (user experience), rather than about the content.”
In addition he reveals:
“Essentially, the issue was a findability issue stemming from a previous initiative…
…the main problem was that after finding a resource…
…the previous UX required them [members] to find the resource again within a grouping of the toolkit requiring multiple clicks.“
It seems the navigational flow of pages was making users work unnecessarily hard to find their answers. This obstructed the learning experience.
So what did they do?
They opted for a flatter (and more user friendly) site architecture.

(Source: Adpearance)
Want a front end screenshot?

Look familiar?
Strikingly similar to the Barn2 Knowledge Base don’t you think?
A simple array of topic-based cards that mirrors the member’s need and links to the related content.
Very easy for the user. And partly because it’s so flat. Any content piece can be conveniently landed upon within a couple of clicks.
What this also proves is that regardless of the type of business, the same fundamental UX (user experience) principles apply to having success with your members-only area website.
Pro tip: Generate user feedback via your restricted content members-only area
But the case study doesn’t end there.
A highly valuable tip that Dr. Dave Chaffey revealed within the article which will massively increase your project ROI was user feedback.
He explains:
“Feedback from members has been the main driver for this change. We use many techniques and channels to get feedback and in all of these, we have had regular prompts from members suggesting a need to improve the usability of the members’ area.”
Sounds very reasonable that being user directed on design and architecture will deliver better results on member satisfaction.
But this begs the question:
“What were the tools and techniques used by Smart Insights to generate this valuable info?”
Dr. Dave lists them as:
- Contextual email marketing surveys
- Contextual feedback tool on pages (inc. voting)
- Customer feedback contact forms plugged into HelpScout

Create a restricted members-only area in WordPress.
Get the PluginAdmittedly, Dr. Dave reports the most effective channel for member feedback was the customer contact forms (which alone generate over 100 questions or comments each month).
The advantage for Smart Insights is unpicking the user experience ‘pain-points’.
This in turn increases their membership satisfaction, subscription retention and ROI.
You only have to multiply the benefit by 150,000 members and we can soon see why Dr. Dave and his team stress the importance of generating user feedback for their online training business.
Pro tip: Rapid content search ability
A quality search function does one better than great navigation.
Hence why Dr. Dave et al. invested in a new Algolia-powered search function in their members-only area.
Take a look:

This new improved search brings a customer order straight to the table.
Much like a ‘table service’ restaurant saves your legs having to run around collecting your dishes at a buffet counter…
.. search also does all the hard work by bringing your online members EXACTLY what they need – ON DEMAND.
And as we said before, enhanced information discovery enhances member engagement and customer satisfaction.
The quick WordPress members’ only area set-up
If there’s one sure way to lose motivation on an online business project, it’s to get weighed down in technicalities.
This is why I recommend this quick and effective way of setting up a members-only area (like the type we’ve seen that gets results).
It’s easily done – with as minimal hassle as possible, yet built for achieving exceptional results.
Here are the steps:
Step 1: Choose and install a suitable members-area theme or plugin
Chances are you’ve already got a theme sorted for your WordPress website.
If so, then you’ll no doubt be hesitant to uproot it for the sake of setting up a members-only area.
But also, if you are starting out from scratch, you’ll probably be leaning towards a catch-all solution.
This will probably take the form of a WordPress theme with a built-in member’s area.
Either way, get a download of Heroic Knowledge Base Plugin and fire it up.
Skip through the wizard prompts and hit the set-up page:

Step 2: Upload some sample members’ content
Next, select the sample content option to throw in some dummy pages and categories to get a ‘feel’ for how your members’ only area could look. Thankfully, all it takes is the click of a button.

Now to see how your sample pages look at the front end.
In the WordPress admin menu look out for ‘Heroic KB’. Then click on the last sub heading, ‘Settings’.

The sub-section of ‘Settings’ that appears first is Home & General. That is exactly where you want to be right now. In particular the first sub-heading is the one you need ‘KB Home Page’.
It’s here that you can determine the homepage of your members’ area.
NOTE: this is not the same as your website’s home page, but rather the entry page into your new members’ only area.
Step 3: Decide on either a custom or default members’ area home page set-up
To choose your preferred members’ area home page, you’re met with a drop down box.

All your website’s pages will be pages listed. The default page selected however, is a new page that the plugin created on install called, ‘Knowledge Base Archive’.
This is the plugin’s own version of that hub (or home) page of your members’ only area with multi-category index of themes, neatly organised by topic for members to leap into their favourite subject matter.
It’s well laid out, decent to look at and offers that flat site architecture to help members find what they’re looking for ASAP.

You don’t have to use this version of the homepage. In fact, you can produce your own custom members’ area home page set up like the Smart Insights or Barn2 Plugins example I gave earlier.
But for that you’d need some nifty graphic design, HTML and CSS skills. Plus as your members’ only area expands you’ll need to make your own custom edits to this page every time.
However, if you’re just starting out – this default automatic version is a great time and budget saver.
Step 4: Take a look at your new members’ only area (with sample content)
To take a look at your new members’ area home page, click on the ‘View this page’ link:
(NOTE – if you’d like to jump straight into editing the homepage, then you would hit the ‘Edit this page’ link)

When you follow the link ‘View this page’, here’s what the front end of the plugin’s own automatically generated members’ area homepage looks like (with your dummy content added):

Neat, organised and the best way of getting your site launched – fast!
Better still, it picks up from your WordPress theme Stylesheet, so you’ll find your members’ only area automatically looks like the rest of your site – without any extra work.
In addition, this hub page version has:
- An in-built support contact button…

- A popular articles widget…

- An Instant search bar…

All proven methods of increasing user satisfaction.
Build your WordPress members’ only area
Now, to introduce your members’ only content to its new home.
Let’s remember that at this stage if you opted to upload sample content, so you’ll have to remove this first.
Step 1: Deleting Members’ only sample content
The quickest way to delete sample members’ area content is to go to ‘Heroic KB’ menu options in the WordPress admin sidebar and click ‘All Articles’:

Next, click on the selection box in the header of the table next to the tag ‘Title’.
Then, find the drop down box immediately above the header label ‘Title’ of the table’s first column – it should ‘Bulk actions’ (as default):

Click on the downward arrow and select ‘Move to trash’ by clicking:

Then hit the apply button:

Now, all those sample content articles are in the trash. You have a clean slate to work from:

Next return your focus to the WordPress sidebar menu and under ‘ Heroic KB’ select the sub-title ‘Article Categories’:

And run the same exercise as above, but this time in the ‘Article Categories’ area, using ‘Bulk Actions’ drop down box:

The next and final step in this sample content deletion process is to repeat this process in the menu sub-area called, ‘Article Tags’:

Now, with all of your sample content uprooted, you can get to building your members’ only content.
Step 2: Add your members’ only content
As would be familiar to you from using WordPress CMS, the Heroic Knowledge Base Plugin information architecture mirrors the ‘Posts’ post type.
In other words, Heroic Knowledge Base articles are like WordPress Posts. And likewise, they come under the Categories umbrella. Plus, you can assign Tags to them.
So, the simple starting point for adding your members’ area content is to 1st map out the hierarchical structure.
Here’s how you might use Google Sheets to map out your members’ only content:

Now, once you know what content you plan to include in your members’ area and how it will sit together – it’s time to produce articles, categories and tags.
To begin with, here’s how you produce an article:
Head over to the WordPress sidebar menu again, locating ‘Heroic KB’, under which you’ll find the sub-heading ‘Add New Article’.
Click that link and find a new article open in the editor:

In the same way in which you would type and publish a WordPress Post, do the same here for a members’ only article.
There are some slight differences found in the Heroic KB Add New Article editor vs. the traditional WordPress Post editor, namely:
- Article Stats
- Article Attachments
- Voting Options
- Voting Feedback
But we’ll skip the details on this for now and address this within a later chapter called “Generate User Feedback”.
Assigning the newly published articles to Heroic KB Categories and Tags in the Add New Article editor works the same as with WordPress Posts.
Simply follow suit.
The great thing about how Heroic KB handles new content is that it:
- immediately fills up the category buckets on the members’ area home page
- elects posts to feature immediately in the ‘Popular Articles’ sidebar widget
- adds new articles to the search results using the search bar
It’s an effortless process having it all link up together.
This leaves you to simply focus on adding new content without the distraction of endlessly tweaking plugin settings.
Job done.
Now your members’ only area content is lined up, it’s time to protect your material.
Methods of restricting access to your WordPress members’ only area content
As mentioned earlier in this post, there are generally 2 simple ways of restricting access to WordPress pages:
- Use WordPress in-built password protection or private access only.
- Use a specialist plugin.
Take a look at how these botk work alongside their pros and cons:
WordPress Password protected vs. Private Log-In Restriction
The simplest way to restrict access to a specific page (or other post content) is to use the different ‘Visibility‘ settings that WordPress gives by default.
You can find these options on the right-hand panel wherever you add a new page or post:

Under the Visibility settings, there are 3 options for the visibility of a page (or post):
- Public – Under this default setting, content is available to all site visitors
- Password protected – Here, only the readers with the page’s (or post’s) password can unlock access to the content
- Private – This option grants access to specific users based on their role
The second and third visibility options allow you to restrict certain content.
Let’s see how:
1. Password protecting pages/posts
This is a very straightforward option giving you the ability to password protect individual pages and posts simply by assigning a password to that page (or post).
Anyone who knows the password(s) can access the content.
Now, this option works if you have a page or two that you’d like to hide from the general public.
However, you can imagine that if you have 100s of articles to protect, you’ll have to maintain and distribute 100s of passwords with all the eligible readers.
Another problem with this method is that if a user finds such content or clicks on a link to such a password protected page, they will see a screen asking for a password, so they’ll know that there’s some protected or exclusive content on your site.
So, if you don’t want the people who don’t have access to learn about this content, then this method won’t solve your purpose.
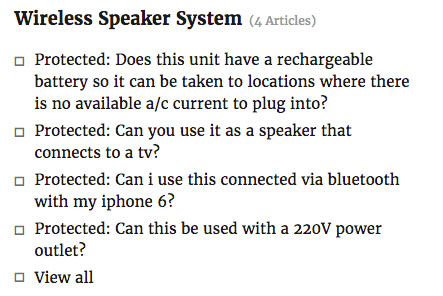
The following screenshot shows an example of a password protected resource:

Furthermore, password protecting a page doesn’t remove that page from the website if you don’t have permission to view it. Instead, the word ‘Protected:‘ is added to the beginning of the title, which does have its uses, but its not ideal if you don’t want people to know there is private content on the website.
2) Marking pages/posts private
Private Pages don’t require individual passwords for getting unlocked. Access to such pages is granted after checking a user’s role. Typically, only site admins or editors can view such private pages.
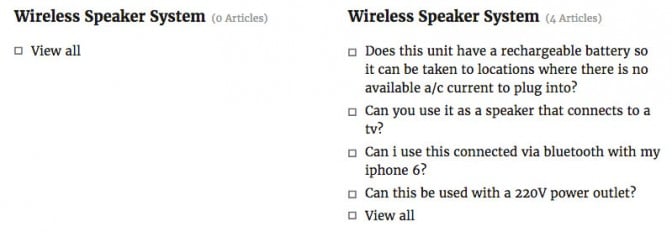
Here’s how a page marked private looks like:

The other big difference between password protected and private pages is that if you don’t have sufficient privileges to view a page, then it won’t display on the website anywhere.
This is especially useful if you don’t want the average website visitor to know there is additional content on the website.
It’s clear:
Of the two options, only the Private visibility setting makes sense if you want to restrict a lot of content on your site.
But as you can tell, you can’t possibly give every user admin or editor level access on your site. Which means you need to introduce another membership level (subscribers). And then set the private pages’ visibility level to that of subscribers. This way, all your subscribers will be able to access all the restricted content.
This is how you might go one step further and set a more sophisticated (but equally easy to assign and manage) restriction of access to members’ only content in your WordPress website.
Using Restrict Content Pro plugin to protect your WordPress members’ only area content

Not only by name has Restrict Content Pro (RCP) become the go-to plugin for ‘content access’ control within WordPress websites, but also by reputation.
Notable personalities and publications in the WordPress ecosystem, including Chris Lema and CSS-Tricks all share glowing reports of RCP’s ability to offer:
“The most extensible membership solution in WordPress.” – Restrict Content Pro.
Let’s take a look at RCP’s ‘behind-the-scenes’ controls and translate its first class features into rewarding ROI benefits for your member site project:
Theme & plugin integration: conveniently programmed to play well alongside your WordPress theme without any custom coding. No clashes, no wasted time working to iron-out creases – it literally blends in seamlessly without any persuasion needed. An example of this is the integration between Heroic Knowledge Base and RCP making an unstoppable WordPress membership site combo.
Build unlimited subscription packages: there’s no ceiling to the number or combination of membership packages that RCP can handle. RCP’s owners claim that it’s the most extensible membership solution and this is one feature that surely validates that statement.
Membership management: let members actively manage their subscriptions – upgrading, downgrading or fulfilling billing amendments without tying up your support staff. The plugin’s membership management area is intuitive and makes administrative housekeeping easy.
Member emails: Restrict Content Pro plugin makes communicating with members effortless. Its built-in members email automation keeps the nurture and notification steps under control with prescribed autoresponders and triggered emails. This takes the pressure off always being on hand to push courtesy mails. Thankfully RCP is programmed with such hospitality included.
Discount codes: discount codes are easily set-up and allocated for members within RCP, flexibly offering the option of dealing out reduced pricing. Trackable, instantly redeemable and easily set-up – discounting membership packages need not become messy with RCP.
Reporting: a dashboard presentation with all of your membership site’s key performance indicators. This gives you, at a glance, a vivid snapshot of where you are against ‘goal’ at any given interval.
But practically, how easy is it to restrict content with RCP?
Restricting page or post content with RCP is as easy as ticking a checkbox and selecting a radio button in your WordPress post editor.
When installed, you’ll see this box on every post, page and category admin view:

By clicking on the relevant radio button you can apply the appropriate level of content restriction:
As you’ll see in the screenshot above, restriction criteria is granular with varying degrees of access.
RCP also allows you to restrict entire post types too.
Plus, at the other end of the spectrum, it facilitates just portions of page/post content being restricted also (controlled by shortcode – simply, cut and paste to lock away premium content).
It’s essentially all you need to adequately manage membership content control via WordPress.
Generate User feedback within the members’ only area of your WordPress website
User demand should be the driver for all content and service investment.
The Smart Insights case study earlier shows that successful large scale membership websites literally make decisions based on what users say.
Sure you need an aggregate picture.
It’s not worth getting tied up in the knots of every user’s opinions, but getting a top level estimation for what would add the most value is critical to staying on track with ROI.
Here’s how to collect user generated feedback within your WordPress member’s only area:
- (Direct) Voting System
- (Direct) Feedback Form
- (Indirect) Search
And they can be split up into two types:
Direct user feedback generators
- Voting system: users vote for the content type as either helpful, or not
- Open feedback: freetext form where users are encouraged to add detail to their vote
Indirect user feedback generators
- Search: users type a query into the search bar. Every user search query is recorded in the admin area for you to analyse.
Although quite different, based on whether the user ‘intended’ to communicate with you or not, the two types of feedback systems can be neatly integrated into your site.
Here’s how the systems work in detail:
Voting system
I’m sure you’ve seen this kind of system used by websites throughout your online experience:

An article voting system is a quick and non-pushy way of asking users and members to share their opinion on how the content was received.
Presumption kills excellence – and in service businesses, like members’ only websites, you cannot afford to guess whether content hits the mark. You’ve got to ask to be sure.
Here’s how to simply set up an article voting system using the Heroic Knowledge Base plugin.
It’s engineered to help you to identify demand for prioritising your members’ area content production:
Voting with Heroic Knowledge Base plugin
User feedback is made both easy and effortless – both for you and your members with the Heroic Knowledge Base plugin.
Voting is the quickest and most painless way of members giving you insight into their experience.
And for this reason, it is good practice to offer on every article the opportunity for members to give a thumbs up, or thumbs down.
Every members’ only article you publish via the plugin, by default has user voting included.
Keeping your content production workflow uninterrupted in the editor.
That said, you do have the option within the meta boxes in the article’s editor of switching voting off (or, ‘disable voting’).

Open feedback
The opportunity for open-ended user feedback is offered to every voter. But not at first.
Getting good conversion rates of user feedback is a balance.
Neglecting a call to engagement (or making it ‘hard to find’ invite) simply leads to no feedback. Whereas pressurising your members with what looks like hard work on their behalf, breeds avoidance.
So, the process of voting feedback eases in the user with a simple ‘thumbs up or down’ and then upon clicking either thumb symbol, a text box appears below asking ‘that little bit more’:

In the WordPress admin panel, the voting feedback is neatly aggregated by Heroic Knowledge Base plugin and summarised like this:


A simple gauge gives an overall score for your members’ only area. Plus you are presented with individual feedback in cards beneath – along with an ID of the article and comments.
Search
The most valuable and insightful source of actionable members’ area feedback should ALWAYS be ‘Search’.
As Google well knows, search is actually a mutually beneficial relationship.
Users benefit from instant answers to critical questions.
And the provider benefits from knowing what users want.
Tip:
Where it really works is when providers act on what users want and ‘chase the (ever increasing) wave’ of demand.
This way providers always stay on top of relevance – and become the de facto choice and channel for users.
This is the key to success for your members’ only area.
Here’s how you do that within your WordPress website:
As mentioned earlier on, ‘Search’ is a default function in the Heroic Knowledge Base plugin.
And is one of the most popular features in such websites.
This is a member’s typical search journey…
Let’s say, a member has a question and types in a query into the LIVE search bar:

As the member types their query, LIVE search offers up a list of the most relevant articles by title and description.
If the member doesn’t select an article from the list, nor find any match in the results – this shows up:

‘No Results’.
The member then has the option of either:
(a) asking for help (‘Contact Support’), or;
(b) continuing their search elsewhere.
If a member opts to ‘Contact Support’, your benefit is that they tip you off for what information that they needed, which you did not have.
This is a heads up for what you could add to fill the gap in your members’ only area content.
Will this gap in your content turn paying members away?
Customer experience expert, Estaban Kolsky, claims:

Estaban also shares from experience that:

What response should you have to this?
Get proactive and fill in your content gaps.
And this is where the Heroic Knowledge Base plugin ‘search’ intelligence (aka. Analytics) helps.

Let’s take a closer look at ‘Null Searches’.

A null search is when a user types in a search that ends up with a ‘No Results’ response from the LIVE search.
The system logs the search phrase and how many times users have queried this within a selected period e.g. ‘Last 12 months’.
The advantage for you, the publisher, is a user-generated, data-driven list of priority content topics that is instantly actionable.
Get filling in your content gap.
Help desk integration for better member satisfaction
There are, of course, those occasions where (even with the best of intentions) – your content just doesn’t cut it.
Which is where customer support comes in.
Ultimately, even a low touch sales environment still needs even very limited hands-on help.
In such cases, customer support is the front line of your battle against member dissatisfaction and churn (cancellations).
According to customer service experience author and thought leader, Shep Hyken, 96.2% of customers will leave for bad customer service. (Source: Forbes)

(Source: www.hyken.com)
And being prompt in ‘letting members know instantly that they were heard’, counts massively in your favour.

(Source: www.hyken.com)
This is why integrating your members’ only area with a solid help desk software is key to keeping members happy.
Here’s how to do that in WordPress:
Using the Heroic Inbox plugin it’s really simple to set-up a fully featured helpdesk software directly inside your WordPress admin area.
- No extra log-ins
- No opening up other tabs in your browser
- WordPress controlled access for all your support staff
3 steps is all you need:

And your inbox is LIVE within only minutes..
No sweat.

What does Heroic Inbox do to help you to achieve customer amazement?
Amongst many other things…
- Send and receive customer support emails right inside WordPress: reduces workflow friction, saving time, by allowing you to perform all of your customer support whilst in the WordPress back-end.
- Keep an auditable history of all support tickets: never risk getting customer support threads buried under ‘other’ emails by using this ‘ring-fenced’ ticketing system.
- Produce a CRM-like profile summary for every enquirer: equip your support staff with a CRM customer profile of every enquiring member.
- Assign requests to any number of registered support staff: there’s no limit to the number of registered support staff the system can cope with. And the system also supports staff collaboration on individual tickets.
- Line up autoresponders: have canned responses to fill in for you on those replicable messages to smoothen out any kinks in response timing.
In addition to all of these, Heroic Inbox is available at a single one-off price. The cost savings against the nearest SaaS solution are huge, year-on-year.
Take home points
Building a restricted access members’ only area in WordPress needn’t be a stressful experience. Nor simply academic.
Members’ only areas should be highly engaging 2-way knowledge transfer environments.
Places where both members and providers learn better ways of working together.
The end results should be an ever increasing depth and breadth of useful content that:
- Has a flat site architecture for easy navigation
- Is shaped by reliable, data-driven user feedback
- Stands alone as a leading information resource in the marketplace
Using smart membership software with built in analytics, like Heroic Knowledge Base plugin for WordPress – literally puts actionable insights on a plate for your team.
By staying on trend with demand, your website will always remain relevant and will not be in want of loyal users.
Are you currently setting up a WordPress restricted access members’ only area?
Are you looking to change your members’ only area software?
Either way, we’d be interested to hear from you.
Leave a comment below.


Thank you for the article! Very helpful!